Easy Homemade Almond Milk

20160603_075333-01

As much as I love dairy, in the back of my mind I knew I had to let it go. The immense joy from consuming some of my favorite foods like towering ice cream sundaes, melty baked brie, and creamy lattes was becoming shorter and shorter lived. (Not to mention my clothes were becoming tighter and tighter!)

I decided to take some action on improving my diet and a friend told me about the Whole30 which encourages eating non-processed food and bans many foods that cause inflammation. One of the things it tells you to give up is dairy. I figured the milk in my daily lattes was the main culprit and decided to switch it out. But I couldn’t stomach drinking black coffee though. I wasn’t a fan of coconut, soy, or rice milk, but was delighted to find out I loved almond milk. But then the Whole30 bans carrageenan (which is a plant extract food companies use as a thickening agent) which was of course included in the only brand of almond milk I liked.

I decided if I am embracing non-processed foods, I might as well try making it myself. Most homemade almond milk recipes used phrases like “soak overnight” or “peel 1 cup of almonds” and other work intensive words that a busy mama does not have time for. Instead, I found an easy shortcut version using just a few ingredients. And the best part is not only does it save you money, but it tastes better than packaged almond milk too. You will love it!

20160603_073709-01

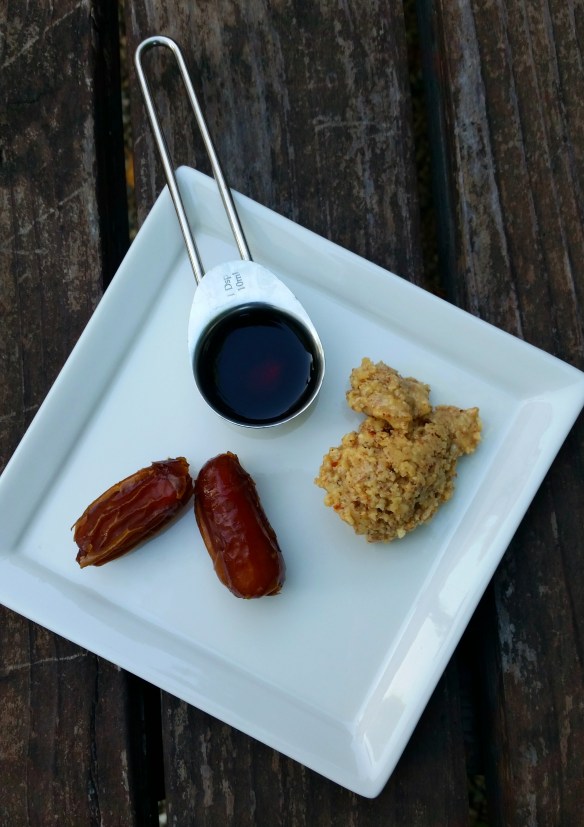
All you need to make delicious almond milk – dates, almond butter, and vanilla extract. Just add water!

Easy Homemade Almond Milk Recipe 

20160603_075228-01

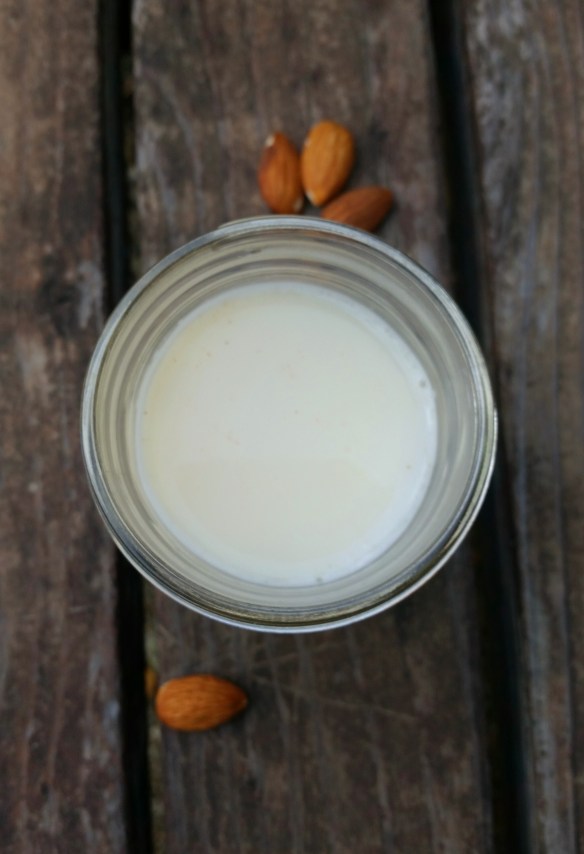
I have just blended this – so it is still frothy and you can see the little grainy bits. They will soon settle to the bottom. You can strain them with a nut milk bag if you wish.

Ingredients:

1 1/2 Tablespoon Almond Butter (I grind my own but you can use store bought as well)

2 Pitted Dates

1/2- 1 Teaspoon Vanilla Extract

4 Cups Water

Method:

1. Place all ingredients in blender (I used my Vitamix) and blend. (usually 30 seconds or so – it will be all frothy or milky.

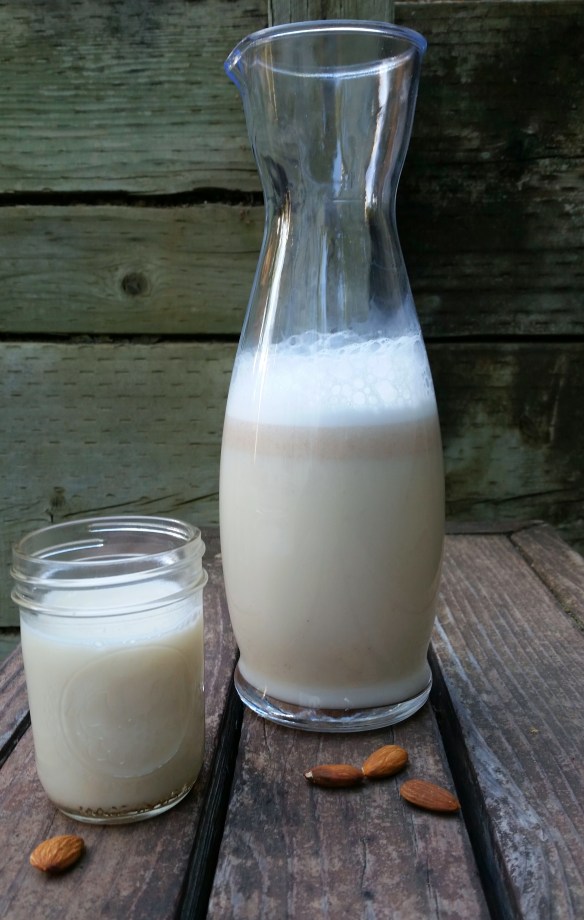
2. Chill in fridge and enjoy. (There are some grainy bits from the dates, so you can strain it with a nut milk bag if you want, but it is sooo small and settles to the bottom so that it does not bother me. Plus extra fiber!) Almond milk keeps in fridge for 3 days or so.

Advertisement

Aloo Tikki with Coriander and Mint Chutney

My son’s current favorite bedtime story is the Gingerbread Man. He especially loves the part “Run, run as fast as you can, you can’t catch me I’m the Gingerbread Man!”  So when he asked if we could make our own gingerbread man I happily agreed. After quickly finding a recipe online and scanning the cupboard to make sure we had all the ingredients, we started. 

As we were rolling out the dough I noticed one item I did not check I had: the gingerbread man cookie cutter. Not wanting to alarm my adoring spectator I decided to cut out the gingerbread men freestyle with a knife. This task was not as easy as it would seem. Each gingerbread man came out more deformed than the next, with lopsided or broken limbs or with heads growing out of arms. None of them seemed like they could run like the one from the story, or even limp for that matter. Nonetheless, after they were baked and decorated, my 3 year old loved them all. Whew!

So after that ordeal, I needed something easy to make for dinner. I decided to make aloo tikkis since they are easy to shape (round!). Again I didn’t anticipate one small detail: everyone in my house likes to eat them differently.

1. I prefer my tikki slightly warmed with a side of green chutney mixed with a splash of kechup.

2. My husband makes a sandwich with a cheese bread roll, the bottom slice spread with green chutney and ketchup. He then adds a layer of crushed Nacho Cheese Doritos and then smashes the tikki on top. He covers the top slice spread with mayonnaise.

3. My one year old likes aloo tikki in a bowl with yogurt and ketchup all mashed together.

4. My three year old didn’t even eat one bite since he was so full with gingerbread men :).

I love how the simplest dish can be enjoyed different ways. I am already imagining tomorrow’s chutney sandwiches I am going to be making with the leftovers….

Aloo Tikki with Coriander and Mint Chutney


INGREDIENTS for Aloo Tikki:

3 large potatoes – boiled with skins on, then peeled
1-2  teaspoon ground cumin
1 tablespoon ground coriander
1 chopped green chili (I leave this out when I make for kids)
½ teaspoon red chili powder
Salt and pepper to taste
1 bunch chopped fresh coriander
1 bunch chopped green onion
2 eggs, beaten
Oil for frying
**Note all spices can be adjusted to taste.

PREPARATION For Aloo Tikki:

1. Mash potatoes in large bowl, when potatoes are still slightly warm. Add all spices and chopped coriander,  green onion and green chili if using. Mix well. Taste and adjust spices and salt if necessary.

2. Shape the mixture into 3” flat rounds. Makes about 8-10 tikkis.

3. Beat 2 eggs in bowl and keep aside.

4. Lightly coat frying pan with cooking oil. Keep on medium high heat.

5. Take one potato round, dip in egg, then put in hot frying pan. Fry 2-3 minutes per side. Repeat  with remaining rounds.

6. Serve with coriander and mint chutney. Recipe below
.
INGREDIENTS for Coriander and Mint Chutney:

1 ½ bunch coriander
½ cup mint leaves
¾  cup plain yogurt
½ teaspoon ground cumin
1 green chili (optional)
Red chili powder (to taste)
Salt (to taste)

PREPARATION for Coriander and Mint  Chutney:

1. Put all items into a blender and blend into a fine liquid. Taste and adjust spices if necessary.

Broccoli Soup

One of my pet peeves is after my son asks me for something to eat, I dutifully make it, and then he doesn’t want it. As I have no intention of making him another meal, it takes some creative maneuvering to rebrand my original dish and trick him into eating the same thing he previously rejected. 

Today he wanted some “green soup”. I quickly had broccoli soup on the table, only to hear, “No mommy, I want red soup. Not green soup.”  Although my wrath was brewing inside, I put a fake smile on my face and swiftly took the soup back to the kitchen to come up with a plan. I transferred the soup to another bowl, grated some cheddar on top, and as it melted, put a red ketchup happy face over the cheese. (Ry is obsessed with happy faces and sad faces lately).  
As I was walking over to him, I hear “No mommy, I want yellow soup.” My eye started twitching. Oh God please let him eat this. I really don’t want to order pizza right     now…  
With the bowl in front of him, he looked it over, and was satisfied at the yellow of the cheese and the red of the ketchup, and ate the whole thing! Success!  
But then he said, “Mommy, can I have more soup please? I want purple.” 

Hmmm…another day, another battle!

Easy Broccoli Soup


INGREDIENTS:

5 cups Broccoli florets (frozen OK)
1 medium potato, peeled and cubed
2 cloves garlic
1/4 – 1/2 cup whole milk
1 small onion, chopped
olive oil
salt and pepper to taste
cheddar cheese, greek yoghurt, breadsticks for garnish if desired


PREPARATION:

1. Cook broccoli and potato. Put the potato and garlic in a saucepan, add enough water to just cover the potato, and boil until cooked.  Put the broccoli in the steamer on top so they cook at the same time. Drain and set aside, reserving 1 cup of cooking water. 

2.  Finely chop onion and saute in olive oil until softened. Add back broccoli and potato with reserved water and milk. Simmer.

3. Puree in food processor or with stick blender. Add more liquids for desired consistency. Season to taste.

4. Garnish with cheddar and greek yoghurt. 

Spinach and Parmesan Cakes

It was around 11am today when Ry gave me the look.  The “mommy I’m hungry” look. So I proactively inquired before the “mommy I’m hungry tantrum” started.


Me: What would you like to eat?

Ry: Green.

Me: You mean like green beans? (Knowing full well he would NEVER ask for those).

Ry: No, like the color.

Ok. So he wants to eat the color green. Not too bad a request. As much as I just wanted to boil some peas and put them  in a green bowl and give him a green fork to eat them with, I decided instead to be a bit more creative. I mean, it’s not like he asked for Chartreuse or Magenta or something. Green had so many options.

I decided to go with something spinachy since it is green, healthy, and most importantly, I already had it at home.  I finally decided on spinach and parmesan cakes. I had found a version of these on Eating Well but mine are much more flavorful and spicier. The best thing about these is that they are great finger foods for kids and easy to pop in a container for a quick snack or light meal on the go.  After I made these, I did end up putting them on a green plate with a green fork and my little man was very happy.
Spinach and Parmesan Cakes


(Using a 12pc muffin tin, Makes 8 cakes if you fill up to the top, or 12 if you fill up half way)
INGREDIENTS:

·         10 – 12 ounces frozen spinach (I used about 11 cubes of the Waitrose frozen spinach), Thawed and drained
·         1/2 cup cottage cheese (low fat ok if you prefer)
·         3/4 cup shredded Parmesan cheese, plus more for garnish
·         2 large eggs, beaten
·         2 clove garlic, minced (if you don’t love garlic as much as me, 1 large clove is ok)
·         2 tbsp minced red onion
·         Red chilli pepper flakes
·         ½ tsp cumin
·         1/4 teaspoon salt
·         1/4 teaspoon freshly ground pepper
PREPARATION:
1.     Preheat oven to 400°F.
2.     In a medium bowl, mix thawed and drained spinach, cottage cheese, Parmesan, eggs, garlic, onion, and all spices. Stir to combine.
3.     Coat the cups of the muffin pan with cooking spray. Divide the spinach mixture among the 8 cups (they will be very full, or 12 cups half way full. (I usually do 12 since I use the smaller portions for feeding the kids).
4.     Bake the spinach cakes until set, about 20 minutes. Let stand in the pan for 5 minutes. Loosen the edges with a knife and remove from pan. Serve warm, sprinkled with more Parmesan, if desired.

Banana Muffins

Oh, do you know the muffin man,
The muffin man, the muffin man,
Oh, do you know the muffin man,
That lives on Drury Lane?


My kids love that song. And I must admit it is rather catchy. Luckily it was stuck in my head as I was wondering what to do with my toddler this afternoon. 


Muffins! We will bake muffins! After trolling online through seemingly endless muffin recipes I finally found one that satisfied my holy trinity of baking recipes:  healthy, easy, and delicious! It seemed too good to be true. But these banana muffins from Cat Can Cook looked amazing! So, measuring cups in hand, we hoped to make our muffin magic.


With over 1000 positive comments on her site for this recipe, Cat was right. Not only were these moist and delicious but  they were so easy that my 3 year old practically made them by himself. What a fun and yummy afternoon of mommy-son bonding. 


Banana Muffins (makes 12 muffins) from Cat Can Cook


3 or 4 Large bananas, mashed (the more bananas the moister, so I use 4)
1/2 cup white sugar (original recipe calls for 1 cup, but I don’t like them too sweet)
1 slightly beaten egg
1/3 cup melted margarine or butter
1 teaspoon baking soda
1 teaspoon baking powder
1/2 teaspoon salt
1 1/2 cups flour
Mix the mashed banana, sugar, egg and margarine together. Set aside. In a separate bowl, mix together baking soda, baking powder, salt and flour. Mix wet and dry ingredients all together. Pour into greased muffin tins, and bake in 350 degrees F oven for approximately 12-18 minutes. Enjoy!