Easy Homemade Almond Milk

20160603_075333-01

As much as I love dairy, in the back of my mind I knew I had to let it go. The immense joy from consuming some of my favorite foods like towering ice cream sundaes, melty baked brie, and creamy lattes was becoming shorter and shorter lived. (Not to mention my clothes were becoming tighter and tighter!)

I decided to take some action on improving my diet and a friend told me about the Whole30 which encourages eating non-processed food and bans many foods that cause inflammation. One of the things it tells you to give up is dairy. I figured the milk in my daily lattes was the main culprit and decided to switch it out. But I couldn’t stomach drinking black coffee though. I wasn’t a fan of coconut, soy, or rice milk, but was delighted to find out I loved almond milk. But then the Whole30 bans carrageenan (which is a plant extract food companies use as a thickening agent) which was of course included in the only brand of almond milk I liked.

I decided if I am embracing non-processed foods, I might as well try making it myself. Most homemade almond milk recipes used phrases like “soak overnight” or “peel 1 cup of almonds” and other work intensive words that a busy mama does not have time for. Instead, I found an easy shortcut version using just a few ingredients. And the best part is not only does it save you money, but it tastes better than packaged almond milk too. You will love it!

20160603_073709-01

All you need to make delicious almond milk – dates, almond butter, and vanilla extract. Just add water!

Easy Homemade Almond Milk Recipe 

20160603_075228-01

I have just blended this – so it is still frothy and you can see the little grainy bits. They will soon settle to the bottom. You can strain them with a nut milk bag if you wish.

Ingredients:

1 1/2 Tablespoon Almond Butter (I grind my own but you can use store bought as well)

2 Pitted Dates

1/2- 1 Teaspoon Vanilla Extract

4 Cups Water

Method:

1. Place all ingredients in blender (I used my Vitamix) and blend. (usually 30 seconds or so – it will be all frothy or milky.

2. Chill in fridge and enjoy. (There are some grainy bits from the dates, so you can strain it with a nut milk bag if you want, but it is sooo small and settles to the bottom so that it does not bother me. Plus extra fiber!) Almond milk keeps in fridge for 3 days or so.

Advertisement

Chocolate Avocado Truffles

20140814_192343_1

In parenting, some moments you just want to last forever. And others you just want to forget. The funny thing is that the line between the two is often blurred.

This week my two little boys made me this beautiful heart “sculpture” with their toy cars while arguing over who loved me more. I must say I was enjoying the conversation. At least initially. It went something like this:

20140812_124640_1– I love mommy.

– No I love mommy more!

– Well I love mommy’s hair. It’s so pretty!

– Well I love mommy’s tummy. It’s sooo soft. Just like a big pillow!

Hmmm…not the best comparison I thought, but I didn’t want to lose this loving moment we were sharing. So I justified it to myself…I mean, who doesn’t like a nice comfy pillow?

But the conversation was on a downward spiral and there was nothing I could do to stop it. It completely hit bottom when my younger one chimed in, “Awww I love it! It looks like there is a baby in mommy’s tummy!”.

And just like that, happy mommy time was officially over.

Actually I am thankful for my little guy’s astute observation of my waistline, for he forced me to realize I need to get back to my healthy eating habits which are currently on hiatus thanks to summer vacation.

Every summer we come to California to see my family and I always go overboard with all the yummy food. Vacation for me means no schedule and over indulging in everything. (Mint chocolate chip ice cream at 1am? Why yes I will have 3 scoops please!) In just 4 weeks I have seen the scale steadily creep higher and higher and my tummy get bigger and dare I say, more pillow-like.

So I decided to compromise. I will add more vegetables and make healthy choices but not deprive myself. And that is when I discovered avocado chocolate truffles. Yes, that is correct… Avocado Chocolate Truffles! All the nutrients in avocados plus all the antioxidants in dark chocolate combine to make a decadent and arguably healthy, treat. Although I won’t be on vacation forever, these truffles let me feel like I always am!

CHOCOLATE AVOCADO TRUFFLES

20140814_181344_1INGREDIENTS:

6-8 oz (Almost 1 cup) semisweet chocolate chips (or use dark chocolate if you want less sweet)

½ cup mashed avocado (about 1 small avocado)

½ teaspoon vanilla extract

½ cup cocoa powder, for coating. *Substitute any other coating such as ground almonds or pistachios, coconut or chocolate sprinkles

METHOD:

  1. Melt chocolate on stovetop or in microwave. Be careful not to burn.
  2. Mash avocado and vanilla with fork or handheld stick blender until smooth. (I prefer to use the hand blender so it is completely smooth)
  3. Mix avocado mixture and chocolate together with spatula and cool in refrigerator for at least 30 minutes or until firm.
  4. Scoop out bite size pieces on baking sheet lined with parchment paper. Roll each piece into a ball and drop into bowl of cocoa powder. Roll around to coat. ( Instead of cocoa powder, you can use shredded coconut or chopped pistachios, rainbow sprinkles or anything you like.) Store in the refrigerator, but you can eat them at room temperature.

Pantry Diva Notes:

20140814_151517_1

Use a handheld blender to get the avocado really smooth

20140814_151759_1

Mix the avocado, vanilla, and chocolate well before chilling in refrigerator.

**By the way, these are super easy to make and fun to make with the kids! Just try not to eat them all at once!

Recipe inspired by the Detoxinista

Rolled a few truffles in rainbow sprinkles which were a big hit for the kids.

Rolled a few truffles in rainbow sprinkles which were a big hit for the kids.

Thai Stir Fried Beef and Vegetables with Coconut Rice

Image

When I literally have no time to make anything, I often make hamburgers.  Just season the ground meat, form it into patties, cook it on the grill, stick it in between two buns, add some cheese and condiments and voila! Dinner is served! A perfect easy meal.

But sometimes the perfect meal doesn’t fit into life’s social schedule. This weekend I was in a total dinner dilemma as we went to a barbecue the day before and were invited for another one the day after.  Not only was I sandwiched in between two hamburger events, but also had chicken burgers at a birthday party earlier in the day.

Then evening rolled around, the kids were starving, and I had to do something with the ground beef that was staring at me from the refrigerator.  I needed a non-burger solution.  I found this Thai inspired beef dish online and it really hit the spot. I would not say this is an authentic Thai recipe, but it is easy, fast, delicious and does not resemble a hamburger…a perfect easy meal!

Thai Stir Fried Beef and Vegetables with Coconut Rice

Image

INGREDIENTS:

1 1/4 cups jasmine rice or basmati rice

1 can (14.1 ounces/ 400ml) coconut milk

Coarse salt

2 tablespoons fish sauce (can use less, to taste)

2 tablespoons soy sauce (can use less, to taste)

1 teaspoon sugar

1 tablespoon vegetable oil

4 garlic cloves, chopped

3 cups broccoli, chopped in small florets

1 red bell pepper, deseeded and chopped

1 thai red chili or 1 jalepeno pepper, deseeded and chopped (Optional – Can omit chili if don’t want to be spicy, or just use less chili, or add a few red pepper flakes instead).

1 pound  or 500g ground beef sirloin

1 cup loosely packed torn fresh basil leaves or 1 tablespoon chopped frozen basil leaves

Lime wedges, for serving

PREPARATION:

1.  In a medium saucepan, combine rice, coconut milk, 3/4 cup water, and 1/2 teaspoon salt. Cover and bring to a boil; reduce to a simmer, cover, and cook until rice is tender and liquid has been absorbed, about 25 minutes.

2.  While rice is cooking, combine fish sauce, soy sauce, and sugar in a small bowl.  Set soy mixture aside.

3.  Heat a cast-iron skillet or wok over high. Add oil, and garlic and chilis (if using). Cook, stirring constantly until garlic softened (about a minute).  Add veggies and cook for a few minutes.  Remove vegetables and set aside.

4. In same pan, add beef and cook until completely browned. Add soy mixture and cook 30 seconds. Add basil and veggies  and cook for a couple minutes, stirring to combine.  Check for seasoning. Serve beef over coconut rice with lime wedges. Tastes yummy with some fresh lime squeezed on top. (I didn’t have limes on hand so used lemon and that works too).

Pantry Diva Logo1PANTRY DIVA TIP: You can use ground chicken, turkey, or pork in this recipe.  Also feel free to add other spices or seasonings…ginger, onion, etc.

You can add any vegetables you have on hand.  Good way to clean out the veggie drawer in the fridge!  Also, I have noticed that if I am making this for kids, the smaller I chop the veggies the better.

Recipe adapted from Martha Stewart’s Thai Beef with Chilis and Basil over Coconut Rice. See original recipe here.

Gaeng Ped Thai Chicken Curry and Dinner with DinnerTime

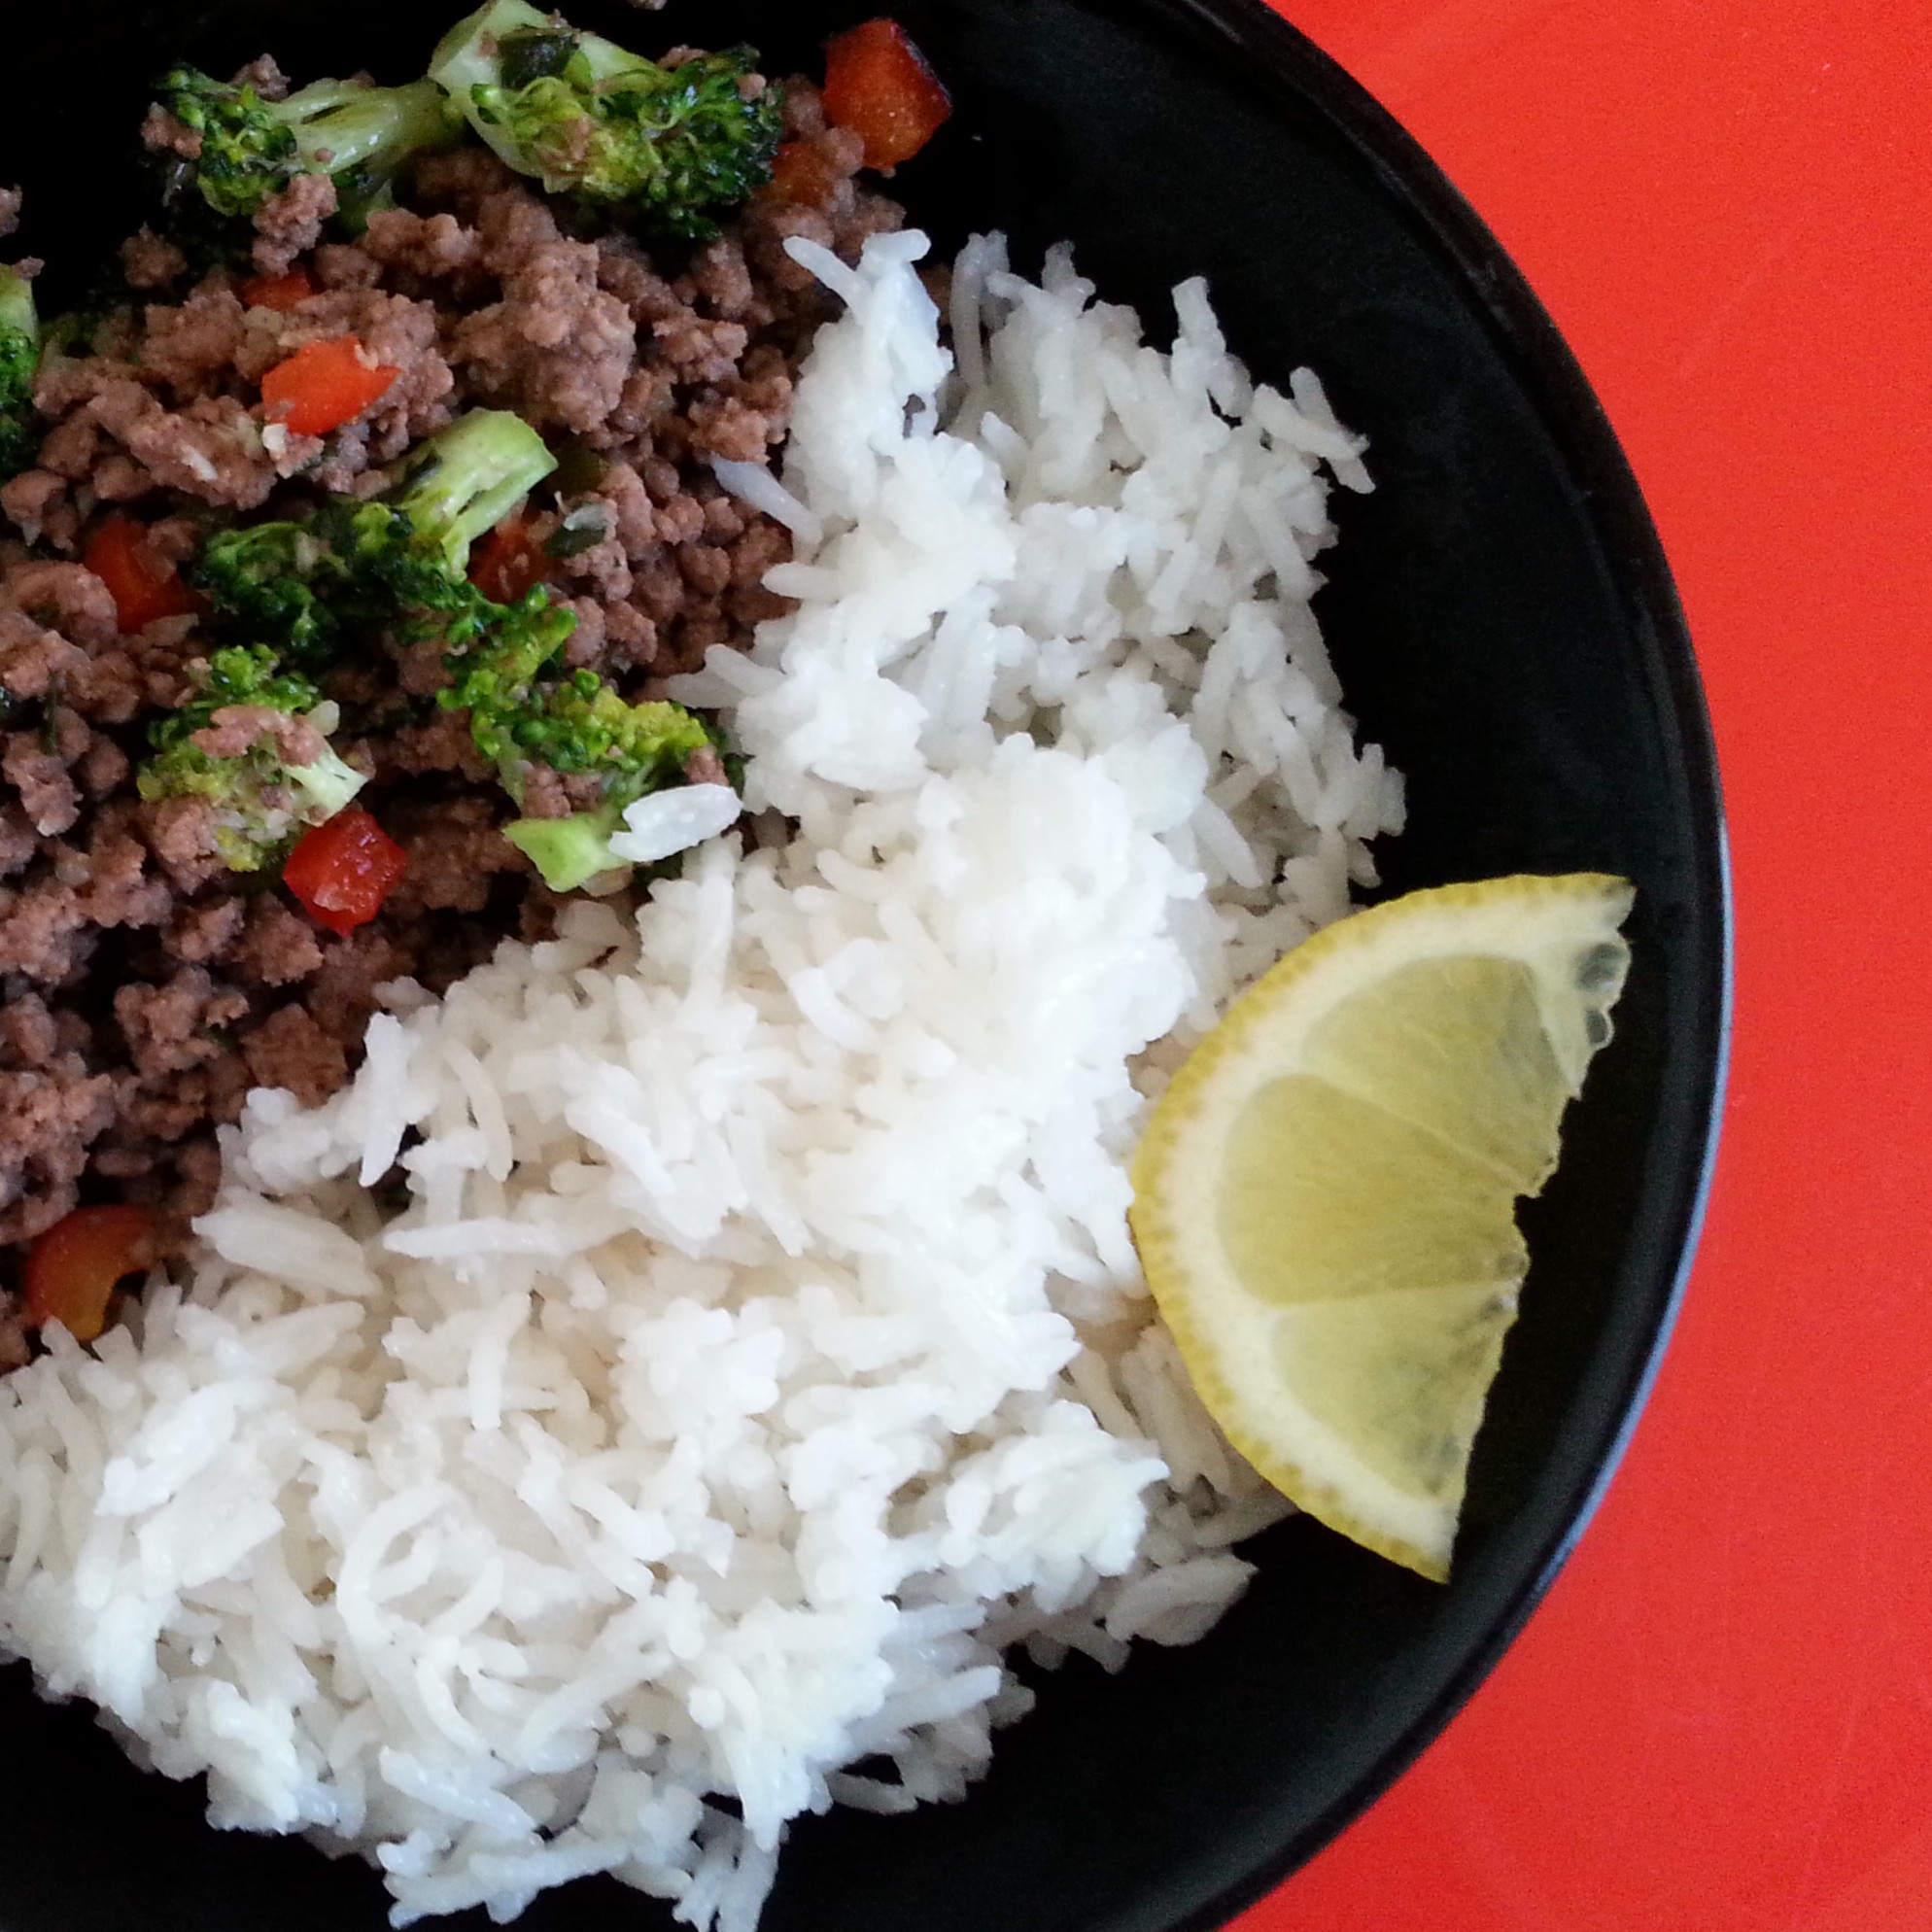
Do your weeknight dinners look like this? 

Image

Not only did I make these dinners at home (in 30 minutes) with healthy and organic ingredients, but all ingredients and corresponding recipes were delivered right to my door!

This amazing service was made possible by DinnerTime, a company that takes all the hassle out of meal planning and cooking at home.

Image

This is how it works: You place an order by Thursday, and then you receive a delivery on the following Sunday for 4 meals. You get all ingredients and all recipes (except a few pantry staples which are mentioned in the recipes) in your delivery so you do not have to go grocery shopping or stress about what to make.  All recipes are easy to prepare and take around 30 minutes to make, so you can make a healthy meal at home both quickly and easily.

Image

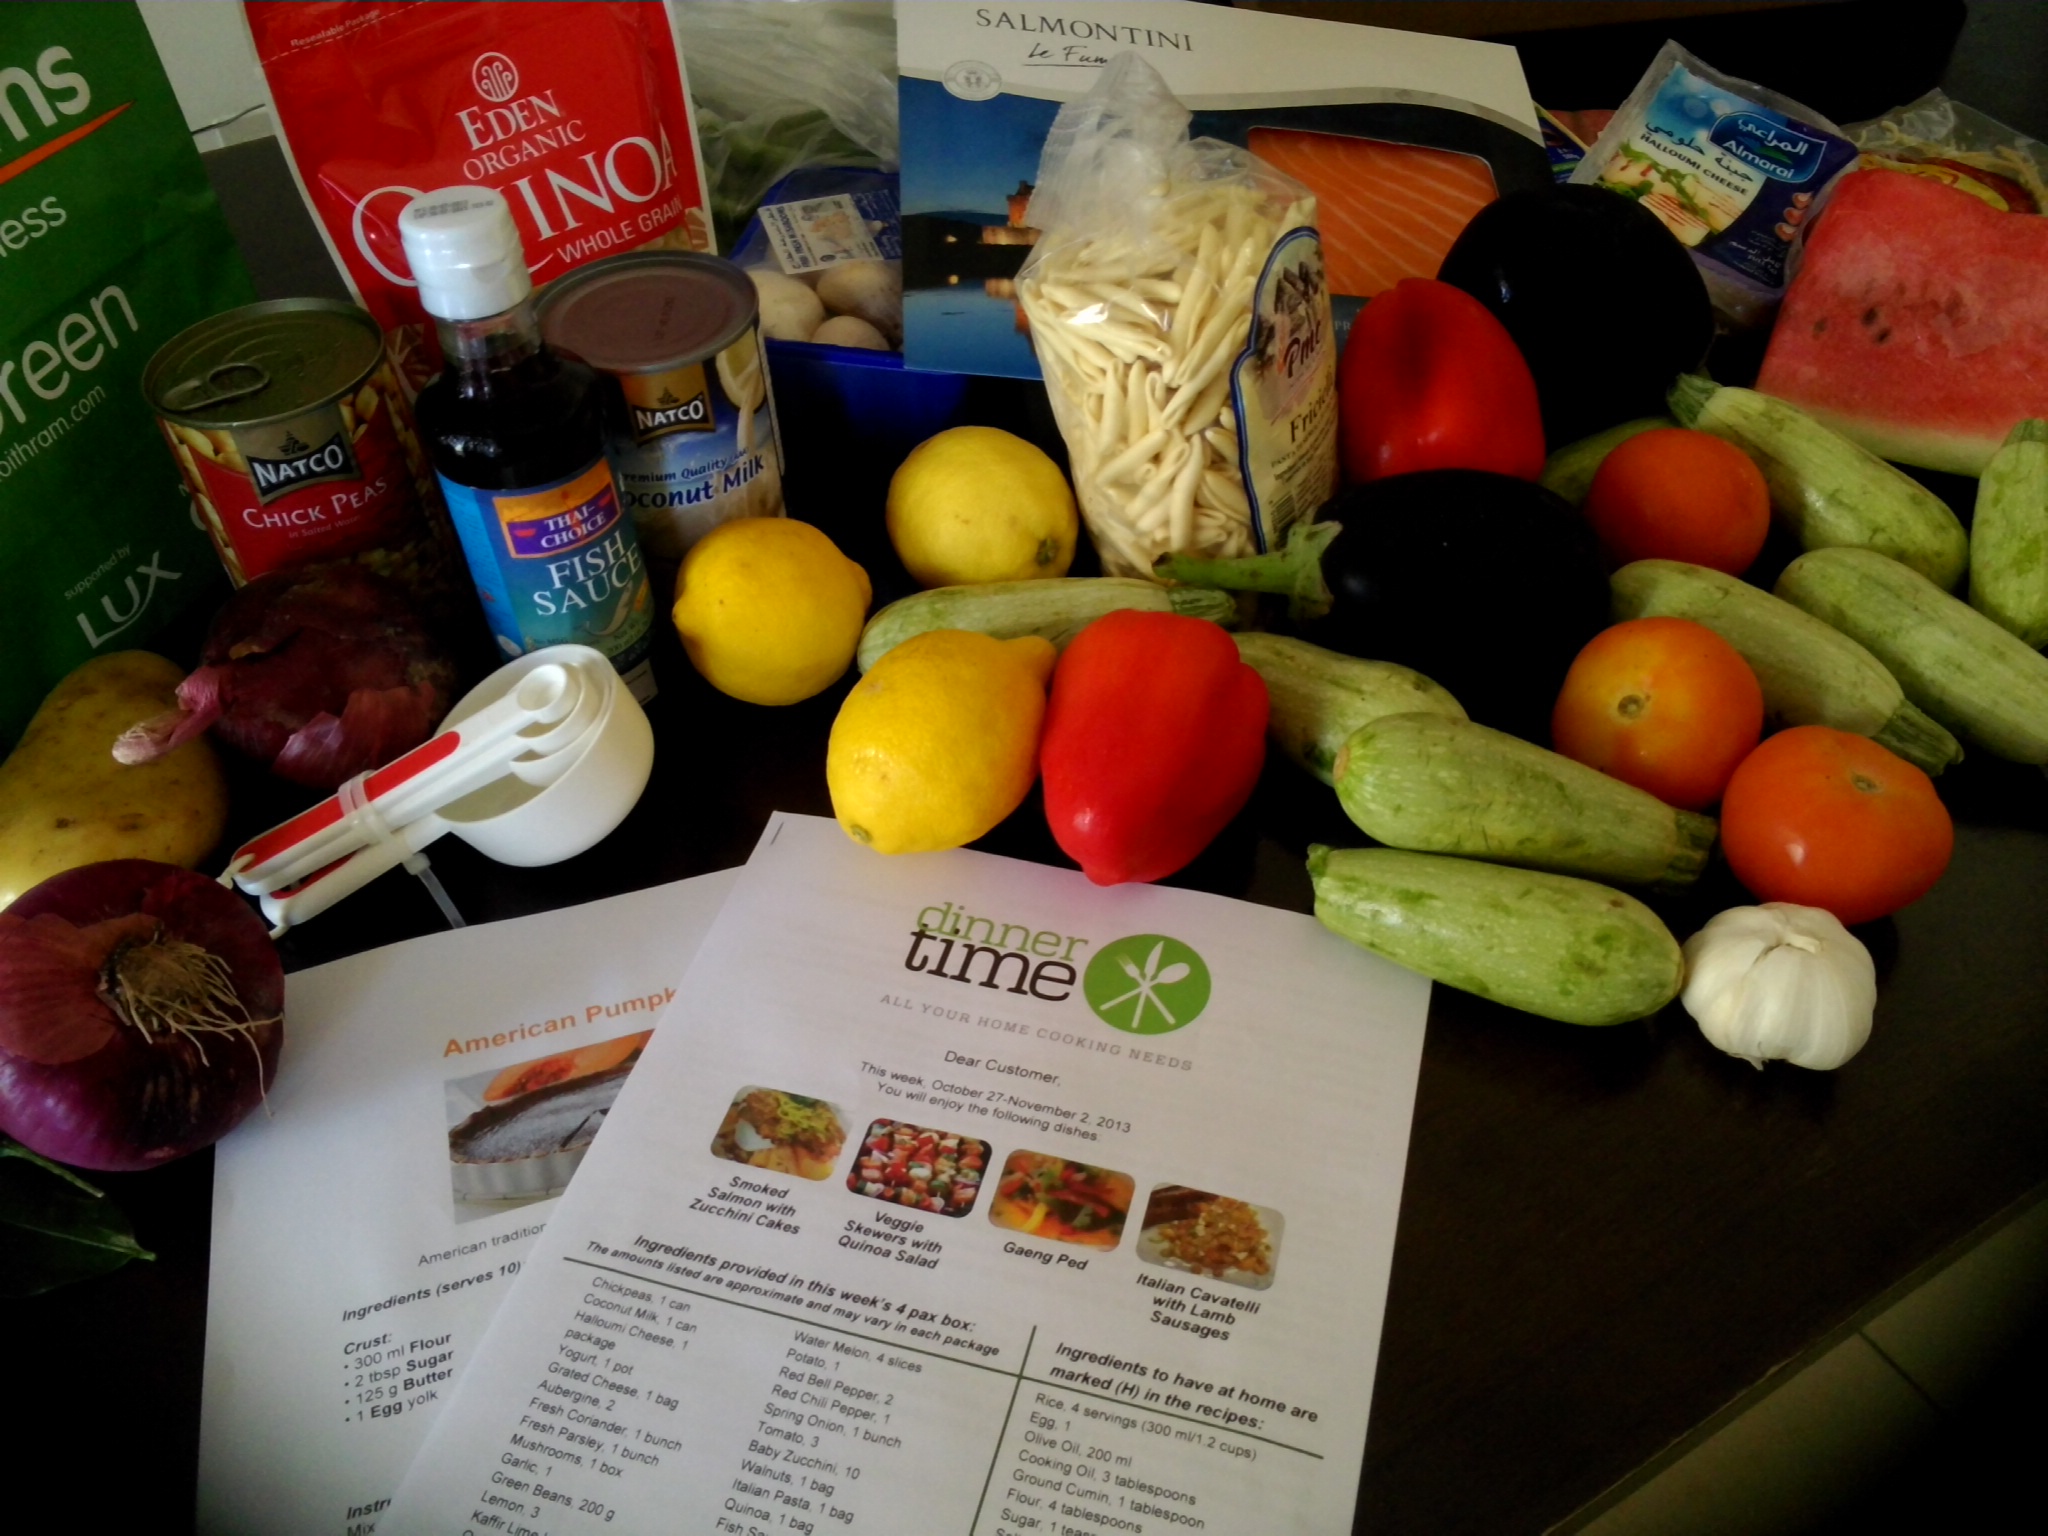
Here is what my delivery looked like after I unpacked it…complete with ingredients, recipes, and measuring cups.

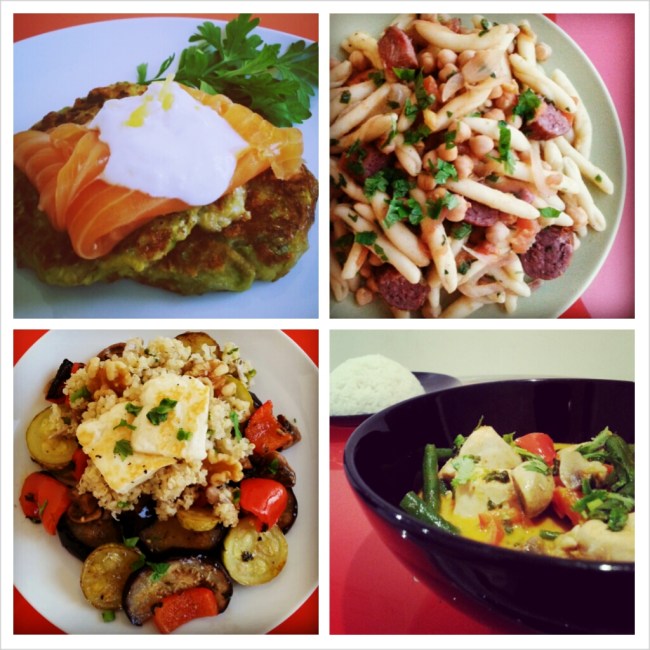
Here is what I prepared for the week:

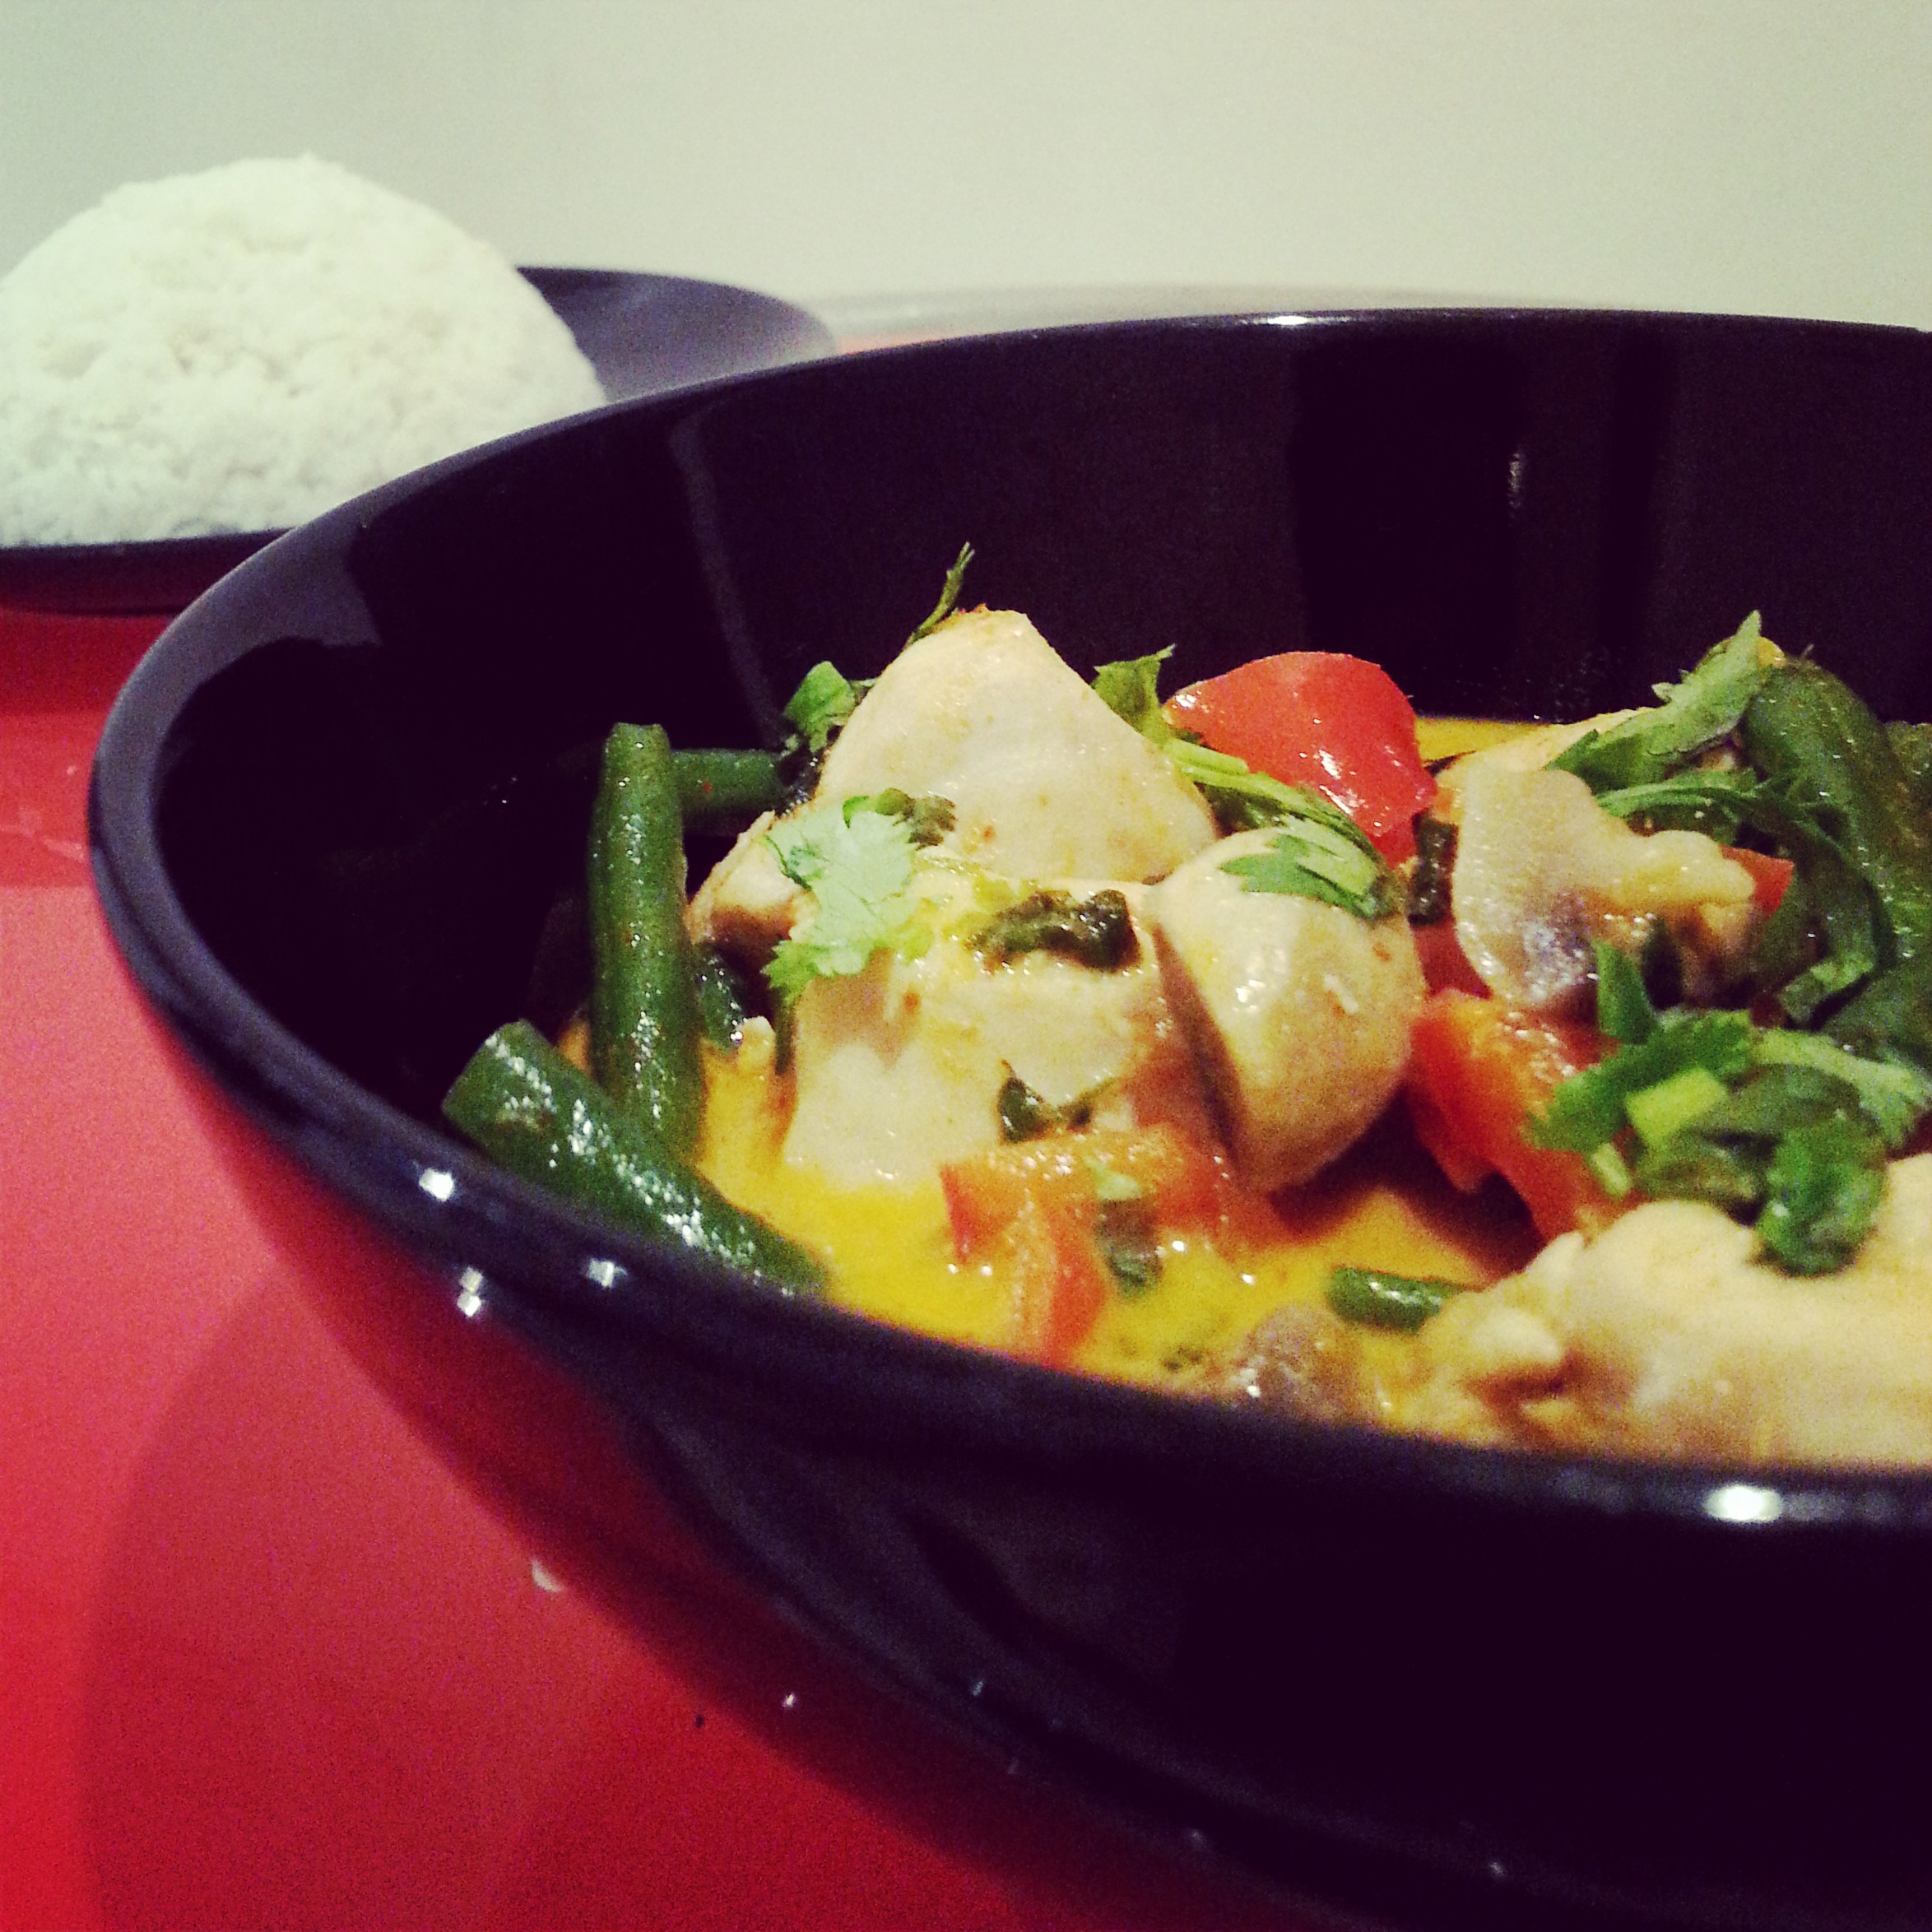
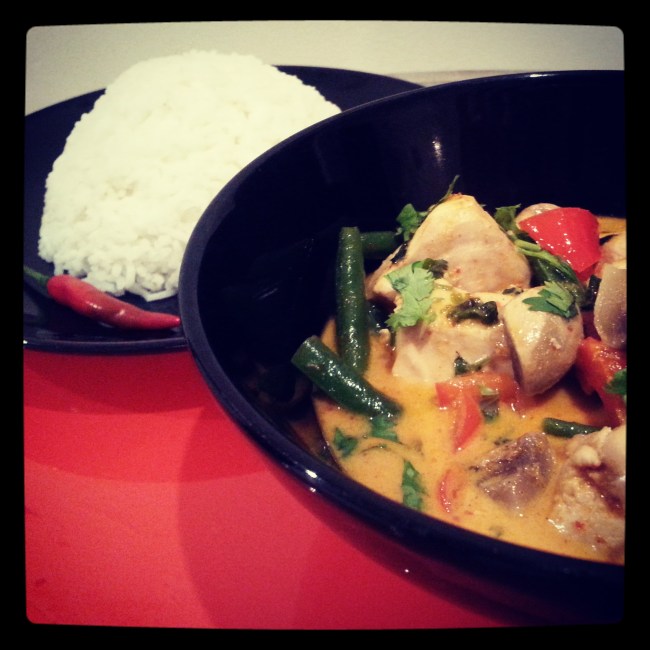
Gaeng Ped – A Thai Coconut Curry with Chicken and VegetablesImage

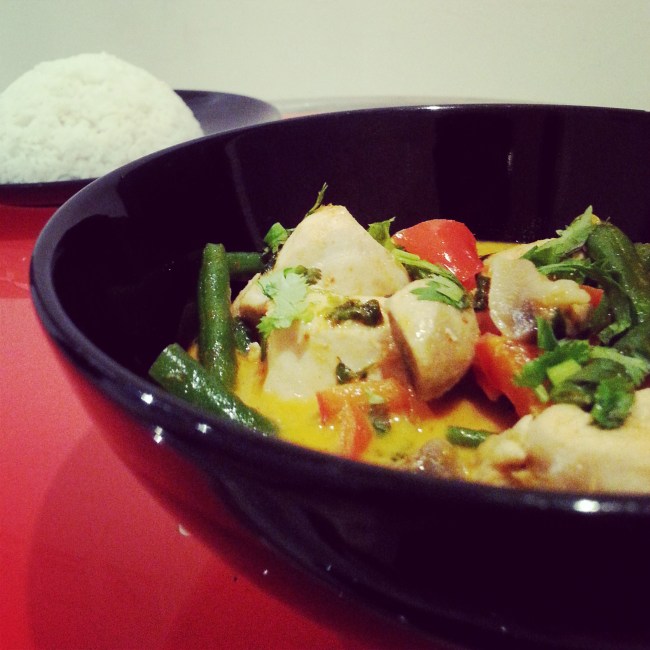
This was the favorite of the week, and I have also included the recipe at the end of this post. I timed it, and all the meals really do take around 30 minutes to prepare. An added benefit is when you make the dish again, you are more familiar with it and can make it even faster the next time. My family actually asked for this curry again and the next time I made it, I shaved about 5 minutes off my time! Woohoo!

Another plus is that I had some of the ingredients left over from the initial DinnerTime order, such as the red curry paste and fish sauce, so I did not have to buy them again, which was great value for money.

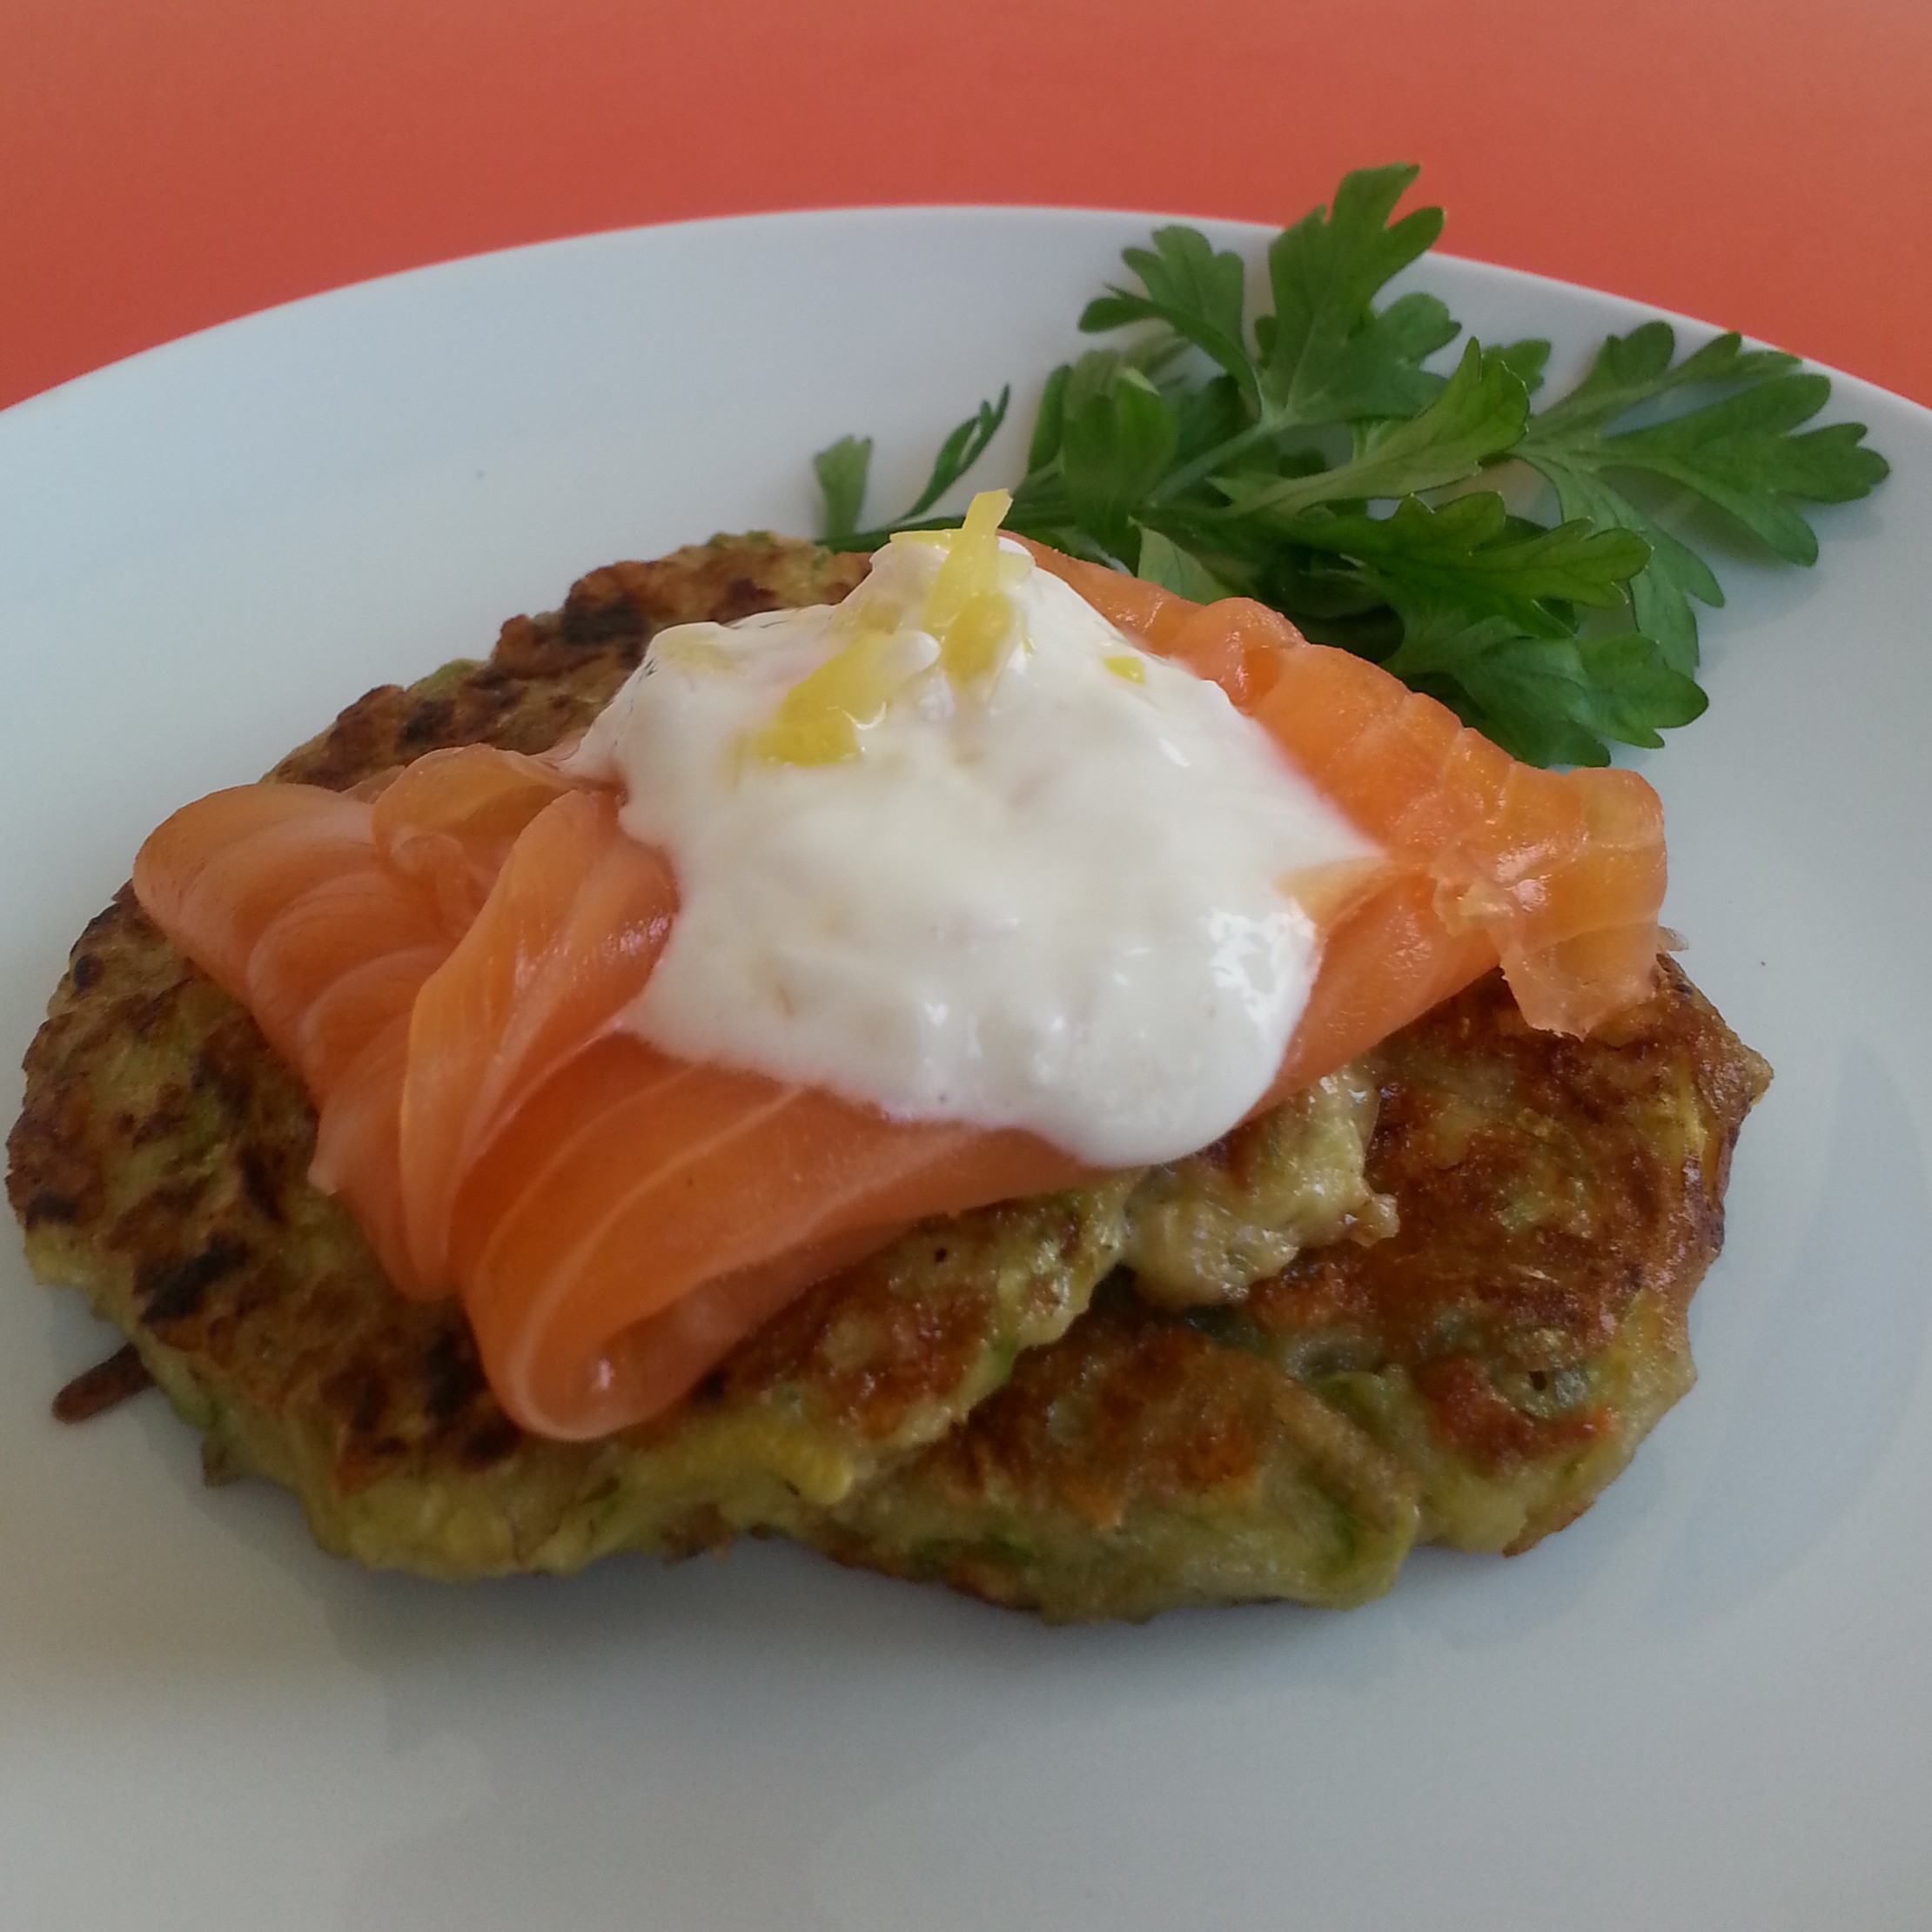
 Smoked Salmon with Zucchini CakesImage

Surprisingly the kids liked the smoked salmon but not the zucchini cakes. It could have also been that I did not cook them properly as they were a bit soggy, although the taste was delicious. I also want to mention the good quality of ingredients; the smoked salmon was from Salmontini and the vegetables were from GreenHeart Organic Farms.

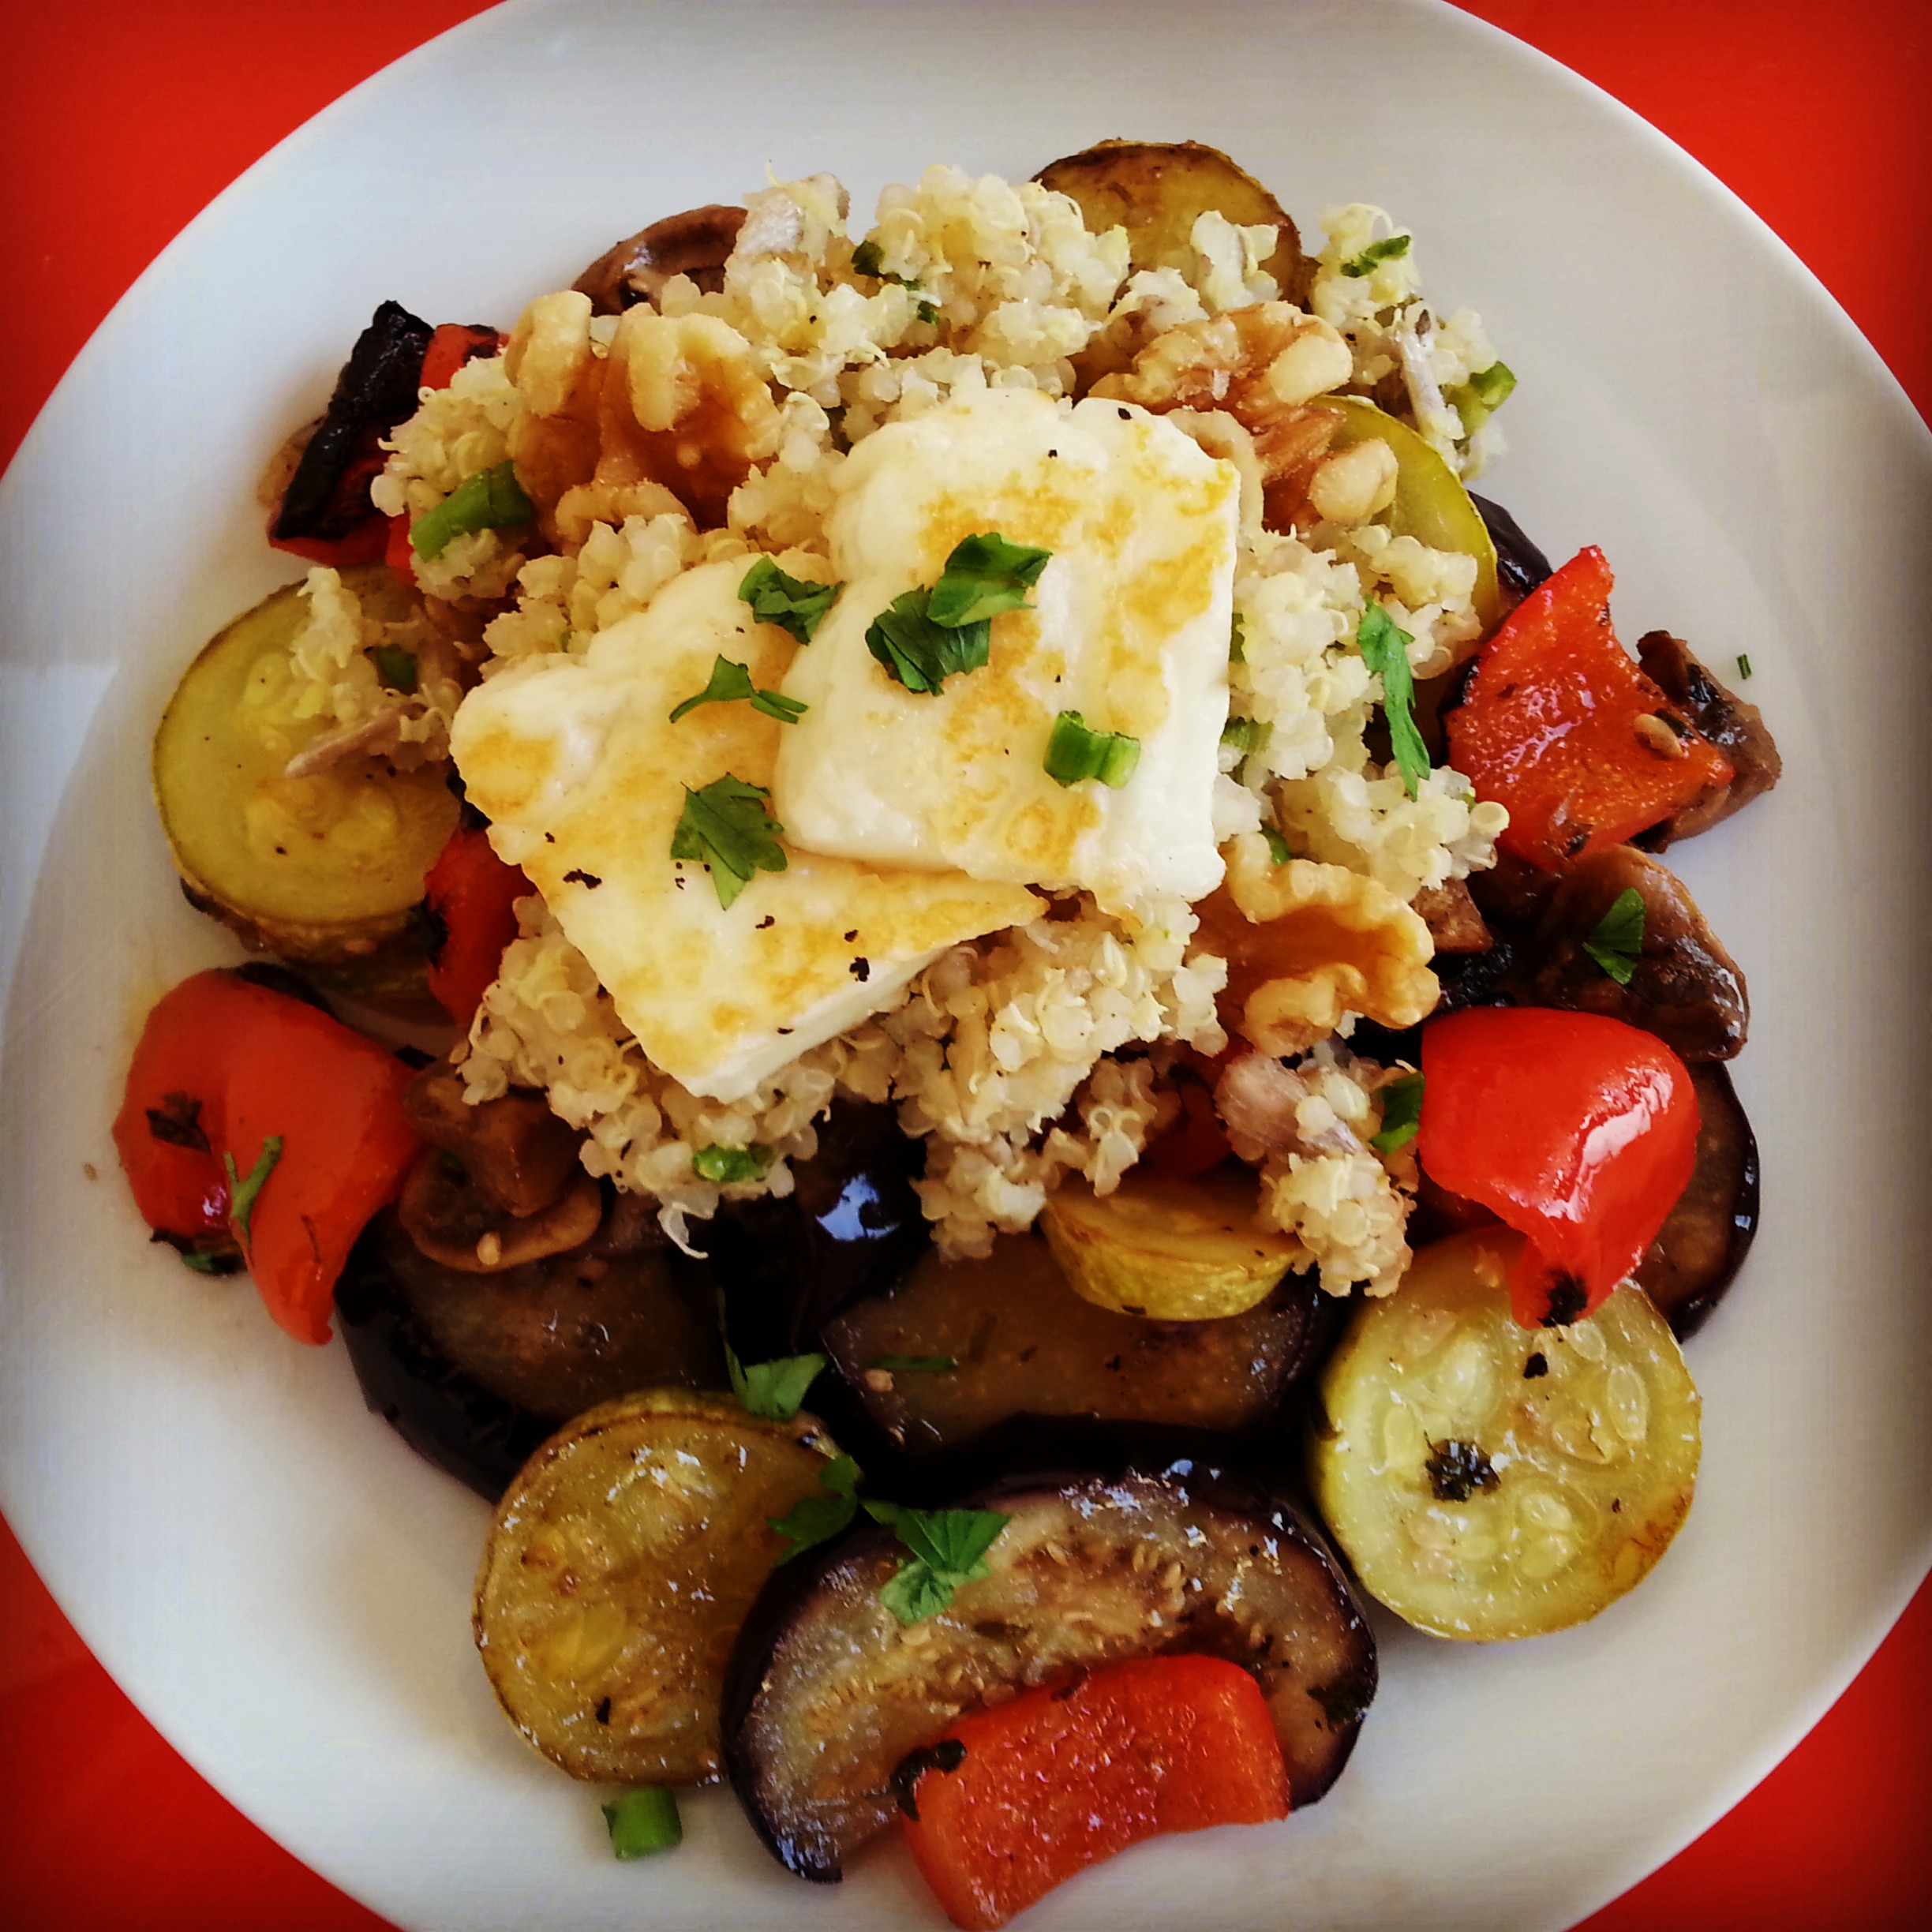
Veggie Skewers with Quinoa Salad

ImageThis day was very hectic, and I just did not have time to skewer the veggies. Instead I just stir fried them in a wok and also pan fried the halloumi cheese. I still made it within 30 minutes, so was happy about that! I also loved that the recipe was flexible enough so I could make last minute changes and still manage to get a good meal on the table!

 Italian Cavatelli with Lamb SausagesImage

This was another favorite of the week. Pasta is always a crowd pleaser, but sometimes pasta can be boring if you make it the same way all the time. But this pasta had chickpeas and spices and other ingredients I hadn’t associated with Italian cuisine, so it was totally new to me, and the sausages went perfectly with it.

Overall, I had a great experience with DinnerTime. To get a nutritious meal on the table without the hassle of shopping and meal planning is a great service for these busy times we live in. But even for someone like me who cooks a lot, it introduced me to new ideas and new dishes I would not have tried before. If I had to give any critique, I would only say that if you have very picky eaters, you may have issues with them eating or trying a new meal. I must admit, my kids did not love the veggies and quinoa meal, and I had to make a quick mac n’cheese for them to eat, but I still had a great meal for my husband and myself to enjoy. We would definitely do this again. Try DinnerTime for yourself!

For more information about DinnerTime and how to order:

Place order on www.dinnertime.me or by phone +971 55-790-8733 by previous Thursday for Sunday delivery. Deliveries are for either 4 person or 2 person meals.
A Gluten Free option is also available, which has the same recipes but uses gluten free ingredients.

Pricing is as follows and are paid cash on delivery:
4 meals for 4 persons (16 servings total): 420 AED /  520 AED Gluten Free
4 meals for 2 persons (8 servings total): 300 AED / 400 AED Gluten Free

There is currently a promotion going on now if you would like to have a weekly subscription:
4 meals for 4 persons (16 servings total): 380 AED /  480 AED Gluten Free
4 meals for 2 persons (8 servings total): 280 AED / 380 AED Gluten Free

DinnerTime UAE LLC
P.O.Box 128110
Dubai – U.A.E.
Phone 055-790 8733
www.dinnertime.me

Here is a sample recipe of what you can expect if you order. My family loved this one and we have already made it again!

Gaeng Ped – Thai Curry recipe by DinnerTime  

Chicken fillets, bell peppers, and red curry in coconut milk, served with rice

Image

Preparation time: 30 minutes

Serves: 4

Ingredients:
4 servings Rice (H), (about 300ml or 1.2 cups) *Note: (H) denotes an ingredient you use from your home pantry
500 gram Chicken Fillet, cut into bite size pieces
1 can Coconut Milk
1 tablespoon Red Curry Paste (amount to taste)
1 ½ tablespoons Fish Sauce
1 teaspoon Sugar (H)
3 Lime Leaves
100-150 gram Green Beans, rinsed and cut info half
1 Red Bell Pepper, rinsed and cut into pieces
½ box Fresh White Mushrooms, sliced
½ bunch Fresh Coriander, chopped, amount to taste

1 deciliter = 100 milliliter = little less than half a cup (125 milliliter)

Preparation:
Start boiling 4 servings of rice according to the package instructions.

Cut the chicken fillet into bite-size pieces.
In a large frying pan, set coconut milk and red curry paste to boil.
Add the fish sauce, sugar, and lime leaves.
Add the chicken fillet and let simmer for about 10 minutes, until chicken is cooked through.

Rinse the green beans and cut them into halves and cut the bell pepper into pieces.
Wash and slice the mushrooms.

Add in the green beans and mushrooms when the chicken is just about done.
Let it simmer for a few more minutes.

Add the bell pepper and simmer for another minute.

Chop the coriander.

Serve the chicken with rice and garnish with coriander.

Vegetable Khichidi Recipe

I have a confession to make. I call myself the Pantry Diva but there are times when even my pantry is bare. We were on vacation this past week and were eating out often, and I did not do my usual grocery shopping. Of course my lack of meal planning had no impact on my family’s incessant daily hunger pangs. One evening, we just returned from the beach and everyone was starving. I needed to make something fast and with literally no ingredients on hand. I decided to make khichidi, which is a one pot meal of rice and daal and vegetables and spices.

Image

I use basmati rice and masoor daal for my khichidi

You can throw any veggies or spices you have on hand, but usually less is more as it is a simple dish and you don’t want to have too many flavors competing with each other. So, while everyone showered I soaked the daal and rice (as I am too paranoid to buy a pressure cooker) and then quickly cooked the khichidi. I usually rate any dish’s success not by its taste or ease of cooking but instead by if my kids eat it or not…and they devoured it! (OK they were starving but hey I take any cooking successes I can get!)

As everyone was scarfing down my khichidi, I was putting all the spices back in my cupboard and I noticed one in particular: Hing.

Image

Hing (Asafoetida) can be bought in Indian grocery stores.

Hing? Although I have been using it for years, I realized I didn’t know much about it. I wondered what exactly is this strange spice and why does it make the khichidi taste so good? After some googling I found out Hing (Asafoetida in English) is a dried and ground resin extracted from a plant. Based on its unpleasant smell in its natural form, hing has been called such names as “Devil’s Dung” or “stinking gum”. This initial information was not encouraging me to find out more about hing. But I kept reading, and it got better: We usually buy hing from the supermarket in its commercial form not fresh form, so the flavor and smell is much more mild. It adds a savory flavor to the food similar to sautéed onion and garlic. In addition to being a flavor enhancer, it also has some health benefits such as aiding digestion and reducing gas. You can find more information about Hing here and here.

Image

Because the khichidi recipe is so versatile, you can add any combination of veggies and spices. I have made it both with and without hing and trust me, you need it. Although it has a subtle flavor, hing is the one spice that is essential in a tasty khichidi. You don’t notice it when it’s there, but you definitely miss it when it’s gone. And remember, a little hing goes a long way…you don’t need to use much. You can find it in any Indian grocery store if your local supermarket doesn’t have it. Apparently it is used in many other Indian dishes too so feel free to experiment. Add Hing (Asafoetida) into your pantry today!

Pantry Diva Tip: This khichidi recipe required grated fresh ginger, and I had no time to go shopping. Store your fresh ginger in the freezer, it keeps for a really long time. When a recipe calls for fresh ginger, just take it out of the freezer, grate what you need, and put it back in. No need to run to the store each time you need ginger!

Vegetable Khichidi Recipe

Image

INGREDIENTS:

1 Cup Basmati Rice

½ Cup Masoor Daal

2-3 cups water 

NOTE: I tend to add more water (about 3 cups water) as I like the khichdi texture kind of “goopy”and stuck together, not like separate grains of rice. Feel free to reduce amount of water. But, if you have NOT presoaked the rice and daal, you can add more water and increase cooking time.

2 teaspoons cooking oil

1 onion, chopped fine

1 teaspoon ginger, grated

1 bunch coriander, chopped (optional for garnish)

1 teaspoon Hing (Asafoetida)

1 teaspoon cumin seeds

½ teaspoon mustard seeds (optional)

½ teaspoon turmeric

Red chili powder,to taste

Salt, to taste

¾ cup peas (frozen ok)

Yoghurt (optional – to serve with khichidi)

NOTE: My recipe above is just a guide. You can add any vegetables you have on hand such as grated carrots, cauliflower, broccoli, peas, etc. You can also add different spices, such as coriander powder, cumin powder, garam masala, black pepper, ginger, garlic. Just remember that this is a simple dish and you don’t want too many flavors competing with each other. Less is more!

PREPARATION:

1. Wash rice and daal and soak for 20 minutes. Note: You do not need to soak beforehand but then you must increase water and cooking time.

2.  Heat oil in a pot, and when hot add the cumin seeds, mustard seeds and hing and stir for a minute.

3. Add chopped onion and stir until very light brown.

4. Add ginger, chili powder, turmeric, and salt and sauté for a few minutes.

5. Add drained rice and daal and mix.

6. Add water and peas and any additional vegetables. Heat until boils.

7. Cover pot and and cook on low heat until rice is done. It is usually done when there are little holes on top of the rice and the water has evaporated.

8. If desired, garnish with chopped coriander and serve with yoghurt or raita.

Spinach, Feta and Onion Quiche

Image

When I first moved to Dubai, it was all about brunch. Friday brunch is an institution in Dubai, and since I was not yet a mother, Friday brunch had soon become my weekly tradition.  I had endless hours to eat, drink, and be merry. (I also had endless hours to recover the next day, as I used to do this thing called “sleep.” ) But now that I have two very rambunctious boys, I cannot just laze around for hours doing brunch. With my new time constraints, I have now moved on to breakfast or shall I say “brekkie.” It fits into my current lifestyle well as breakfast is so early in the day, an essential quality for my little early risers, as well as being a relatively quick meal so we can go out and do other things.

At first I was not accustomed to eating much at breakfast. In the past, I never had much appetite early in the morning (probably because I was still sleeping). But if I did happen to be awake, I would eat some cereal at the most. Soon, as my brekkie dates got more regular, I noticed I would always order the same thing: quiche. I loved how no matter what type of quiche I would order, it would always taste good…smoked salmon and chives, artichokes and onions and cheese, roasted red pepper and feta…the delicious combinations were endless.

The funny thing is that I always thought of quiche as something I could only buy at a restaurant, and not something I could make at home. Homemade crust? I thought that must surely take ages and won’t be easy to do with my little monkeys running around.  It was not until I went to my friend’s place for breakfast (who has 3 kids) and served me homemade quiche at 9:30am straight out of her oven that I realized quiche was a home made brekkie possibility. I did try one version here, but I have since simplified it and have an even easier, tastier and healthier version I make now. I am constantly trying to get my kids to eat more veggies, and they actually like this!

This recipe takes less than 30 minutes to prepare so it is definitely something you can throw together quickly (and clean up while it bakes), or even make ahead and rewarm later. I would love for you to try it and let me know how it turns out. I would also love to hear your favorite quiche recipe or flavor!

Pantry Diva Tip: Feel free to use up any veggies or cheese you have hanging out in your fridge, quiche is a great way to clean out that veggie drawer!

PS. Hubby eats this too…yes men do like quiche, they just don’t always admit it!

Spinach, Onion and Feta Quiche

Image

Crust Ingredients:

1 cup flour

1/2 teaspoon salt

¼ cup melted unsalted butter OR 1/4 cup olive oil  OR 1/4 cup canola oil

1/4 cup ice  water (I use refrigerated water)

Filling Ingredients:

1 red onion

2-3 cloves garlic

2 bunches fresh spinach, chopped, thick stems removed, or baby spinach (6-8 cups)

4 eggs

1  ½ cups lowfat milk OR ¾ cup whole milk and ¾ cup heavy cream if want a denser and creamier consistency (I use lowfat milk and it tastes great!)

Reduced fat low salt feta cheese, or any cheese you prefer

Extra virgin olive oil

Salt and freshly ground black pepper to taste

Crust Preparation:

1. Mix flour and salt with fork.

2. Beat oil (if using) and water with fork to thicken and pour into flour and salt. If using butter, just pour directly into flour with water.  Mix with fork until the dough holds together.

3.  Press dough into 9″ round pan OR roll out dough on silpat liner with rolling pin and press into 9” round pan. (I prefer the roll out method as it is faster and more uniform, although it does compromise on the flakiness of the crust. Either method is fine!)

Filling Preparation:

4. Chop onion and garlic in chopper.

5. Heat olive oil in pan and sauté onion and garlic for a couple of minutes, then add chopped spinach and sauté until it is wilted. Season with salt and pepper and let cool. Add spinach mixture into the prepared crust.

6. In separate bowl, beat eggs, milk ( and cream if using) with salt and pepper with mixer. Pour over the spinach mixture in crust.

7. Top with crumbled low fat reduced salt feta cheese, or any cheese of your choice.

8. Bake at 200C/400F until done, around 35-45 minutes. Let cool for 10-15 minutes before cutting.

Watermelon Curry and Pantry Diva Live at Blogger Week

I am one of those people who fantasize about having my own cooking show on TV. Sometimes when I’m in my kitchen, I pretend I’m on the Food Network show “Chopped”, where I have a mystery basket of ingredients and have to make an amazing dish for the harsh judges before time runs out.  Actually now that I think about it, this scenario isn’t too far off from the daily dinner rush at home with my family of angry judges hungry kids.  

Image

Although winning “Chopped” would be amazing, what I really want is to have my own cooking show where I connect with my fans and share delicious recipes. This Friday I got to do just that, when I took part in the “Meet the Blogger Week” event sponsored by Lootah Premium Foods at Lafayette Gourmet.

Image

It was an amazing experience to put on the microphone and make my watermelon curry in front of a live audience. The live interaction with the crowd really forms a connection you just cannot get from behind a computer. Blogger week is still going on until September 23rd, with cooking demos at 12 noon and 4pm. You can also win a trip to Mauritius by posting your picture from the event on Instagram; just caption it #LPFbloggerevent and tag @Lootahpremiumfoods.

Image

My dish for the event was a Rajasthani watermelon curry. Although it is called a curry, I think of it more as a light first course (served chilled or room temperature like a borscht or a spicy soup), or as an additional side dish complementing other sides (like daal or sabzi) in an Indian meal.  The watermelon curry can be eaten hot or cold and is a combination of sweet, sour, and spicy flavors. I find is especially refreshing to enjoy during the scorching summer months in Dubai.

Pantry Diva Tip: This is a great way to use up excess watermelon after a barbecue or party. This is also an easy dish to make if you are short on time and need to quickly dash to the store, as all the ingredients should be in your pantry except the watermelon!

Watermelon Curry

ImageINGREDIENTS:

 2kg (4.4 pounds) watermelon pieces cut into 1.5 inch cubes (seedless watermelon if possible)

1 teaspoon paprika powder

½ teaspoon red chili powder (to taste, leave out if prefer mild flavor)

1 teaspoon turmeric powder

1 ½  teaspoon coriander powder

1-2 teaspoon garlic puree

Salt to taste

2 tablespoons vegetable oil

1 teaspoon cumin seeds

 Juice of 2 large lemons

Sugar to taste (optional)

Coriander (for garnish optional)

PREPARATION:

1. Cut watermelon into 1.5 inch cubes, and divide 1.5kg (3.3 pounds) for the curry, and 500g (1.1 pound) for the juice.

2. Take 500g (1.1 pound) watermelon cubes and make sure there are no seeds. Puree in food processor to make juice. To the juice add: paprika, turmeric, chili, and coriander powders, garlic puree, and salt. Set aside.

3. Heat vegetable oil in wok and add the cumin seeds, and after 20 seconds add the juice. Lower the heat and simmer for 5 minutes or until the liquid reduces by a third. If using sugar, add now, and also add the lemon juice. Cook for another minute. (I prefer to leave out the sugar as I feel the watermelon is sweet enough).

4. Add the 1.5kg (3.3 pounds) cubed chopped watermelon and cook over a low heat for 4-5 minutes. Gently toss while cooking so all the pieces are covered in the spice mixture. Turn off heat and garnish with coriander if desired.

Serves 4 as a first course or 6-8 as a side dish

*Recipe inspired by The Great Curries of India by Camellia Panjabi

My first post as Pantry Diva – Shakshuka: Poached Eggs in Tomato and Chickpea Sauce

Image

Hello Everyone! So this is my first post as Pantry Diva instead of Khana Mama. This change came about because when people would ask me, “So what is your blog about?”, I always found myself struggling to come up with a succinct answer that would summarize the idea of my blog. So during a brainstorm session with friends, the concept of Pantry Diva was born. I am rejoicing that I now have a tagline: “Making fabulous things from everyday ingredients found in your pantry.” Oh joy!

The main difference in Pantry Diva is that I now have a clear direction in writing. But the theme of simple, healthy recipes will remain the same. And by the way, all of the old Khana Mama posts have been transferred to Pantry Diva so nothing has been lost. I still have a bit of reformatting to do, but that will come in time. Please bear with me!

It is actually lucky that I already have my blog in place, because my first recipe required the finesse of a true Pantry Diva. Yesterday, the 46th floor in my building had a broken pipe, and water was spewing down the whole building. This flood had forced the temporary closure of all our elevators. I was home with hungry children and dinner time was quickly approaching. I live on the 21st floor so my options were:

A. Walk down to grocery store to buy items and then walk back up and cook.

Yea right.

B. Walk down with children to restaurants below.

Assuming we would even make it, this would cause them to be hungrier and crankier.

C. Order food and make the poor delivery guy walk up to our place.

Tempting…but again not the healthiest option and unsure about delivery time.

D. Look in the old pantry and see what I can whip up.

Walking is not something we do much here in Dubai, and no I will not send my maid down in this heat…so ‘option D’ was the winner.

As I was looking through my well stocked pantry I remembered this past summer when I was visiting my family in California and needed to throw together a quick meal without a trip to the store…I made my version of Shakshuka and everyone loved it. It is traditionally a Middle Eastern breakfast dish of poached eggs in a tomato sauce, but you can enjoy it anytime. You can serve it with Arabic bread, pita, rice, or any bread you have lying around. I like to eat it plain too!

Image

 Shakshuka: Poached Eggs in Tomato and Chickpea Sauce

INGREDIENTS:

2-3 teaspoons olive oil

1 medium onion, finely chopped

5 garlic cloves, minced

2 jalapeños, seeded, finely chopped (optional- pickled jalapenos in a jar work too)

½ cup of roasted red peppers (optional – I just had these lying around so I added them in)

1 15-ounce can chickpeas, drained and rinsed

1 tablespoon paprika

1 teaspoon ground cumin

¼ teaspoon cayenne or red chili powder (optional or to taste)

2 14 oz. cans of chopped tomatoes

¼ cup toasted pine nuts (optional for garnish)

Salt and freshly ground black pepper to taste

1 cup coarsely crumbled feta (goat cheese or any cheese you prefer)

6-8 large eggs

Small bunch chopped fresh coriander (Or any herb you like – you can keep extra fresh herbs frozen in olive oil or just chopped and frozen in ice cube trays so you have some on hand all the time)

Warm pita bread (or rice or any bread you like)

PREPARATION:

1. Preheat oven to 425°F (220C). Heat oil in a large ovenproof skillet over medium-high heat. Add onion, garlic, and jalapeños; cook, stirring occasionally, until onion is soft, about 6-8 minutes. Add paprika, cumin, and cayenne and chickpeas and cook for 1-2 minutes longer.

2. Add canned tomatoes and their juices. Add red peppers if using. Bring to a boil, reduce heat to medium-low, and simmer, stirring occasionally, until sauce thickens slightly, about 15 minutes. Season to taste with salt and pepper.

3. Sprinkle feta evenly over sauce.

4. Crack eggs one at a time and place over sauce, spacing evenly apart. Transfer skillet to oven and bake until whites are just set but yolks are still runny, 5–8 minutes. (I kept mine in for 8 minutes and they were pretty much cooked through. Also it’s better if you keep the eggs on the surface instead of making little wells and letting eggs touch the bottom of the pan otherwise they overcook immediately).

5. Garnish with cilantro and pine nuts. Serve with pita for dipping.

By the way, if you hate eggs, just leave them out! It is delicious without them too.

Shakshuka  recipe inspired from Epicurious.

Spiced Roasted Chicken with Garbanzo Beans and Cherry Tomatoes with Yoghurt Sauce

Have you ever noticed how certain things can trigger different emotions? Maybe you have an outfit that makes you feel amazing so you can walk into a meeting with confidence and authority. Or perhaps you hear an old song on the radio and it brings back fond memories of your first school dance. For me, all my emotions revolve around food. If I’m happy, I eat, if I’m sad, I eat. Even if I’m happy for someone, I make something and go eat with them.  

I have a recipe that brings me utter joy, and a recipe everyone will thank me for. It is a recipe that will save you on a weekday when you don’t have time to cook. It is a recipe that you can cook and take to a potluck or bring to a friend. It is a recipe that the whole family will enjoy.  It is delicious, nutritious and has minimal preparation and cook time. I will not say much more about this recipe but will only relay my emotions about it:  I feel  love that I have found it, joy when eating it, and now happiness that I can pass it along.

Spiced Roasted Chicken with Garbanzo Beans and Cherry Tomatoes with Yoghurt Sauce


Inspired by a recipe from Epicurious

INGREDIENTS:
3-4 Tablespoons extra-virgin olive oil
4 garlic cloves, minced
1 tablespoon smoked paprika
1-2 teaspoon ground cumin
cayenne powder to taste
½-1 teaspoon salt
1/2 cup lowfat plain yogurt or Greek yogurt
4 chicken breast halves with bones or 12 drumsticks (I like to use drumsticks because easier for kids to grab and eat)
1 15-ounce can garbanzo beans (chickpeas), drained and rinsed
1 12-ounce container cherry tomatoes
1 cup chopped fresh coriander, divided
Cous Cous, Rice, or Pita to serve with, if desired

PREPARATION:
1. Preheat oven to 450°. Put olive oil, garlic, cumin, paprika, cayenne and salt in large bowl and mix. Place chicken inside bowl and mix so it is covered with the mixture. Take out spice covered chicken and place in  roasting tray.
2. Pour chickpeas in same large bowl chicken was in. Put ½ cup coriander in as well and mix around. There should still be a bit of spice inside the bowl to coat the chickpeas. Pour the chickpeas over the chicken in the roasting pan.
3. Put the tomatoes on the chicken and chickpeas in the roasting pan and put in oven at 450F for 30 minutes or until done.
4. While chicken is in oven, put yoghurt in a small bowl and add a ½ – 1 teaspoon of cumin, and cayenne and salt to taste. Add water to thin yogurt to desired consistency. Set aside.
5. If desired, make rice or cous cous or salad to serve with chicken.
6. Take chicken out of oven when done, and sprinkle with remaining coriander. Serve with rice or cous cous or pita and yogurt sauce.

Almond Tea Cake

I just celebrated my birthday in January. It was a month long affair, with dear friends and family showering me with gifts, well wishes, and of course tons of cake .  I really felt happy and blessed to have so many amazing people in my life and I would like to give something back. I have a cake recipe that is so simple to make, so tasty and very forgiving so it’s almost impossible to mess up.

This almond tea cake is delicious and beautiful and perfect for any occasion. I have used it for afternoon tea, baby showers, dinner parties,  and since it takes almost no time to prepare, have even made it on the spot for unexpected guests.

Enjoy! 

Almond Tea Cake

INGREDIENTS:

1 ½ cup Sugar
¾ cup Butter
1 ½ cup Flour
2 Eggs
Pinch of Salt
1 teaspoon Almond Extract
Slivered or Sliced Almonds for garnish

PREPARATION:

1. Melt butter and blend into sugar
2. Mix in eggs, one at a time.
3. Add flour, salt, almond extract and mix well.
4. Line 10” iron skillet with foil (Or just use a round cake tin)
5. Pour batter into pan and top with almonds for garnish
6. Bake at 350F for 25-30 minutes, or check center with toothpick for doneness.