Easy Slow Cooker Butter Chicken/ Chicken Makhani

IMG_2620

Butter chicken with naan – perfect comfort food anytime.

With the cool Fall weather comes cravings for warm hearty comfort food, and this creamy luscious butter chicken does not disappoint. Serve this dish atop fluffy basmati rice, or use as a vessel to dip your pillowy naan, and eat curled up by the crackling fireplace for maximum indulgence.

As it is made completely in the slow cooker, this dish is easy to prepare and makes your house smell divine as the aroma infuses the air. I have made this dish for potlucks, dinner parties, or just an easy weeknight meal and it is always a hit. Enjoy and comment below how you liked it!

Pantry Diva Logo1

Easy Slow Cooker Butter Chicken /

Chicken Makhani Recipe

Ingredients:
cooking spray
1 1/2 pounds boneless skinless chicken thighs
1 medium red onion, finely chopped

For sauce:
4 cloves garlic, finely chopped
1 teaspoon ginger, finely grated
1 6 oz. can tomato paste
1/2 cup plain yogurt (greek ok too but I prefer this one)
1 can coconut milk (I like this one)
2 tablespoon red curry paste (I like this one)
1/4 cup milk (lowfat ok too)
1 scant tablespoon garam masala
1 teaspoon curry powder
1/2 teaspoon turmeric
3/4 teaspoon salt
1/2 teaspoon red chili powder

Garnish:
1/4 – 1/2 cup chopped cilantro (to taste)
2 tablespoon salted butter

Method:

1. Spray liner of slow cooker with cooking spray and add chopped onion
2. Chop chicken thighs into bite size pieces and put on top of chopped onion. Sprinkle with salt if desired.
3. Mix all the remaining sauce ingredients in separate bowl. Whisk together and pour over the chicken. Mix all together in slow cooker.
4. Add 2 tablespoons of cold butter on top. Cover and cook on high for 3.5 – 4 hours.
5. When done, mix together slowly with spoon. (It is ok if it looks a bit curdled, it will become thick and creamy). Add in chopped coriander and stir. Serve immediately.

Vegetable Khichidi Recipe

I have a confession to make. I call myself the Pantry Diva but there are times when even my pantry is bare. We were on vacation this past week and were eating out often, and I did not do my usual grocery shopping. Of course my lack of meal planning had no impact on my family’s incessant daily hunger pangs. One evening, we just returned from the beach and everyone was starving. I needed to make something fast and with literally no ingredients on hand. I decided to make khichidi, which is a one pot meal of rice and daal and vegetables and spices.

Image

I use basmati rice and masoor daal for my khichidi

You can throw any veggies or spices you have on hand, but usually less is more as it is a simple dish and you don’t want to have too many flavors competing with each other. So, while everyone showered I soaked the daal and rice (as I am too paranoid to buy a pressure cooker) and then quickly cooked the khichidi. I usually rate any dish’s success not by its taste or ease of cooking but instead by if my kids eat it or not…and they devoured it! (OK they were starving but hey I take any cooking successes I can get!)

As everyone was scarfing down my khichidi, I was putting all the spices back in my cupboard and I noticed one in particular: Hing.

Image

Hing (Asafoetida) can be bought in Indian grocery stores.

Hing? Although I have been using it for years, I realized I didn’t know much about it. I wondered what exactly is this strange spice and why does it make the khichidi taste so good? After some googling I found out Hing (Asafoetida in English) is a dried and ground resin extracted from a plant. Based on its unpleasant smell in its natural form, hing has been called such names as “Devil’s Dung” or “stinking gum”. This initial information was not encouraging me to find out more about hing. But I kept reading, and it got better: We usually buy hing from the supermarket in its commercial form not fresh form, so the flavor and smell is much more mild. It adds a savory flavor to the food similar to sautéed onion and garlic. In addition to being a flavor enhancer, it also has some health benefits such as aiding digestion and reducing gas. You can find more information about Hing here and here.

Image

Because the khichidi recipe is so versatile, you can add any combination of veggies and spices. I have made it both with and without hing and trust me, you need it. Although it has a subtle flavor, hing is the one spice that is essential in a tasty khichidi. You don’t notice it when it’s there, but you definitely miss it when it’s gone. And remember, a little hing goes a long way…you don’t need to use much. You can find it in any Indian grocery store if your local supermarket doesn’t have it. Apparently it is used in many other Indian dishes too so feel free to experiment. Add Hing (Asafoetida) into your pantry today!

Pantry Diva Tip: This khichidi recipe required grated fresh ginger, and I had no time to go shopping. Store your fresh ginger in the freezer, it keeps for a really long time. When a recipe calls for fresh ginger, just take it out of the freezer, grate what you need, and put it back in. No need to run to the store each time you need ginger!

Vegetable Khichidi Recipe

Image

INGREDIENTS:

1 Cup Basmati Rice

½ Cup Masoor Daal

2-3 cups water 

NOTE: I tend to add more water (about 3 cups water) as I like the khichdi texture kind of “goopy”and stuck together, not like separate grains of rice. Feel free to reduce amount of water. But, if you have NOT presoaked the rice and daal, you can add more water and increase cooking time.

2 teaspoons cooking oil

1 onion, chopped fine

1 teaspoon ginger, grated

1 bunch coriander, chopped (optional for garnish)

1 teaspoon Hing (Asafoetida)

1 teaspoon cumin seeds

½ teaspoon mustard seeds (optional)

½ teaspoon turmeric

Red chili powder,to taste

Salt, to taste

¾ cup peas (frozen ok)

Yoghurt (optional – to serve with khichidi)

NOTE: My recipe above is just a guide. You can add any vegetables you have on hand such as grated carrots, cauliflower, broccoli, peas, etc. You can also add different spices, such as coriander powder, cumin powder, garam masala, black pepper, ginger, garlic. Just remember that this is a simple dish and you don’t want too many flavors competing with each other. Less is more!

PREPARATION:

1. Wash rice and daal and soak for 20 minutes. Note: You do not need to soak beforehand but then you must increase water and cooking time.

2.  Heat oil in a pot, and when hot add the cumin seeds, mustard seeds and hing and stir for a minute.

3. Add chopped onion and stir until very light brown.

4. Add ginger, chili powder, turmeric, and salt and sauté for a few minutes.

5. Add drained rice and daal and mix.

6. Add water and peas and any additional vegetables. Heat until boils.

7. Cover pot and and cook on low heat until rice is done. It is usually done when there are little holes on top of the rice and the water has evaporated.

8. If desired, garnish with chopped coriander and serve with yoghurt or raita.

Barbecue Delights in Downtown Dubai and Banjan Borani (Afghani Eggplant) Recipe

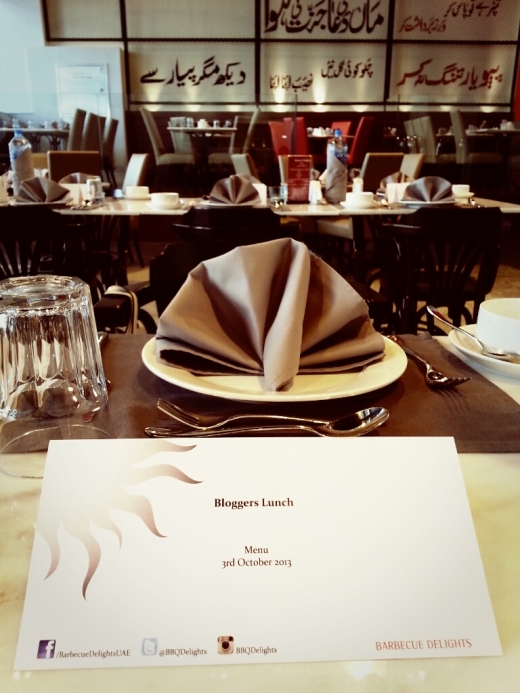
Being a food blogger definitely has its perks, and one of them is receiving invitations to fabulous foodie events around town. Barbecue Delights, a restaurant specializing in Pakistani, Afghani, and North Indian cuisines, was hosting a lunch at their newest location in Downtown Dubai, and I was one of the lucky food bloggers invited.

Image

Barbecue Delights downtown location

Image

Upon walking into the restaurant, I was immediately drawn to the beautiful artwork on the walls, inspired by the colorful way in which trucks are designed in Pakistan. The restaurant had commissioned an artist from Pakistan who makes “Truck Art,” and he flew all the way to Dubai to see the panels fitted together and mounted on the wall. The finished result is striking.

Image

Beautiful “Truck Art”

On a side note, my husband is Pakistani. When I visited Pakistan, I loved seeing all the colorful busses and trucks driving around, and was constantly pointing out how beautiful they were. I even bought a postcard with the colorful trucks on it, much to the amusement of my local Pakistani family. So seeing the “truck art” on the wall was a fun (and beautiful) reminder of those memories.

Image

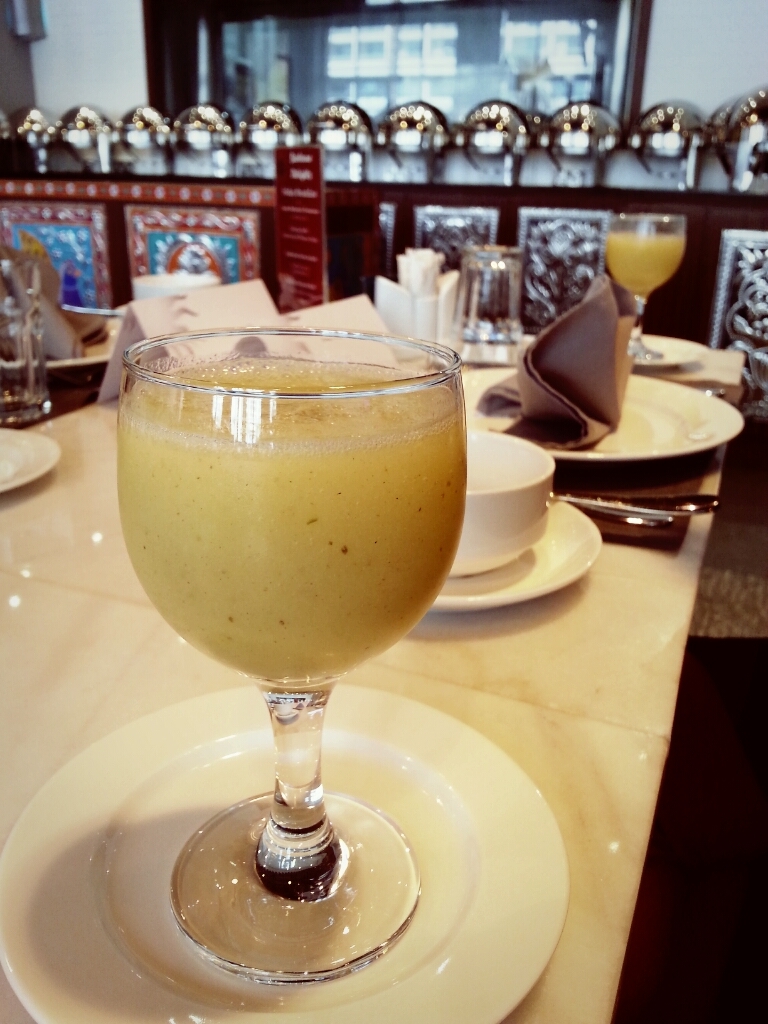
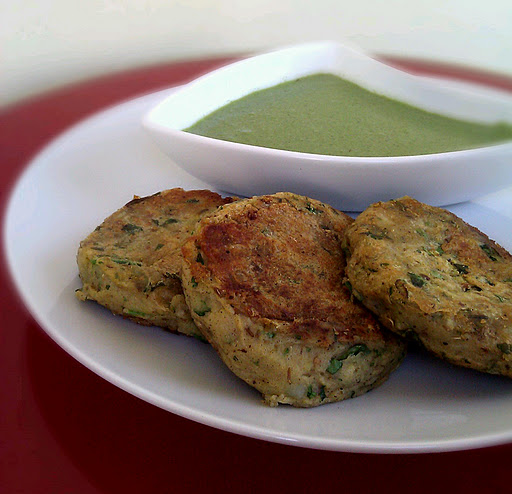
So back to the meal. After being seated we were welcomed with a refreshing beverage of green mango blended with cumin while we perused the menu’s selection of appetizers which were about to arrive. The starters were a Rocca Salad, both Aloo and Keema naan, and an Afghani Mutton Rosh, which is a hearty stew of mutton, vegetables and aromatic spices.
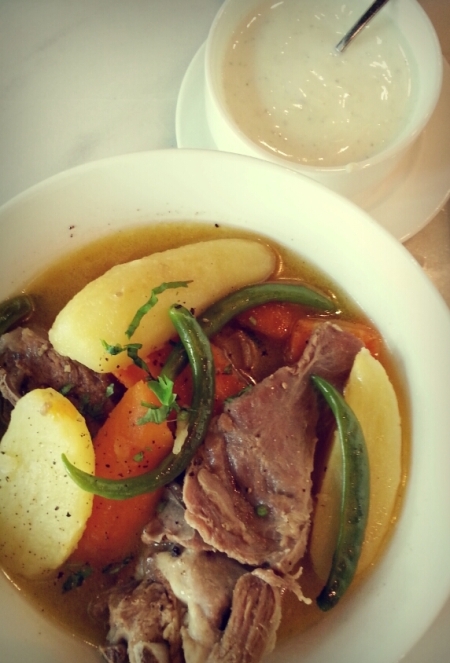
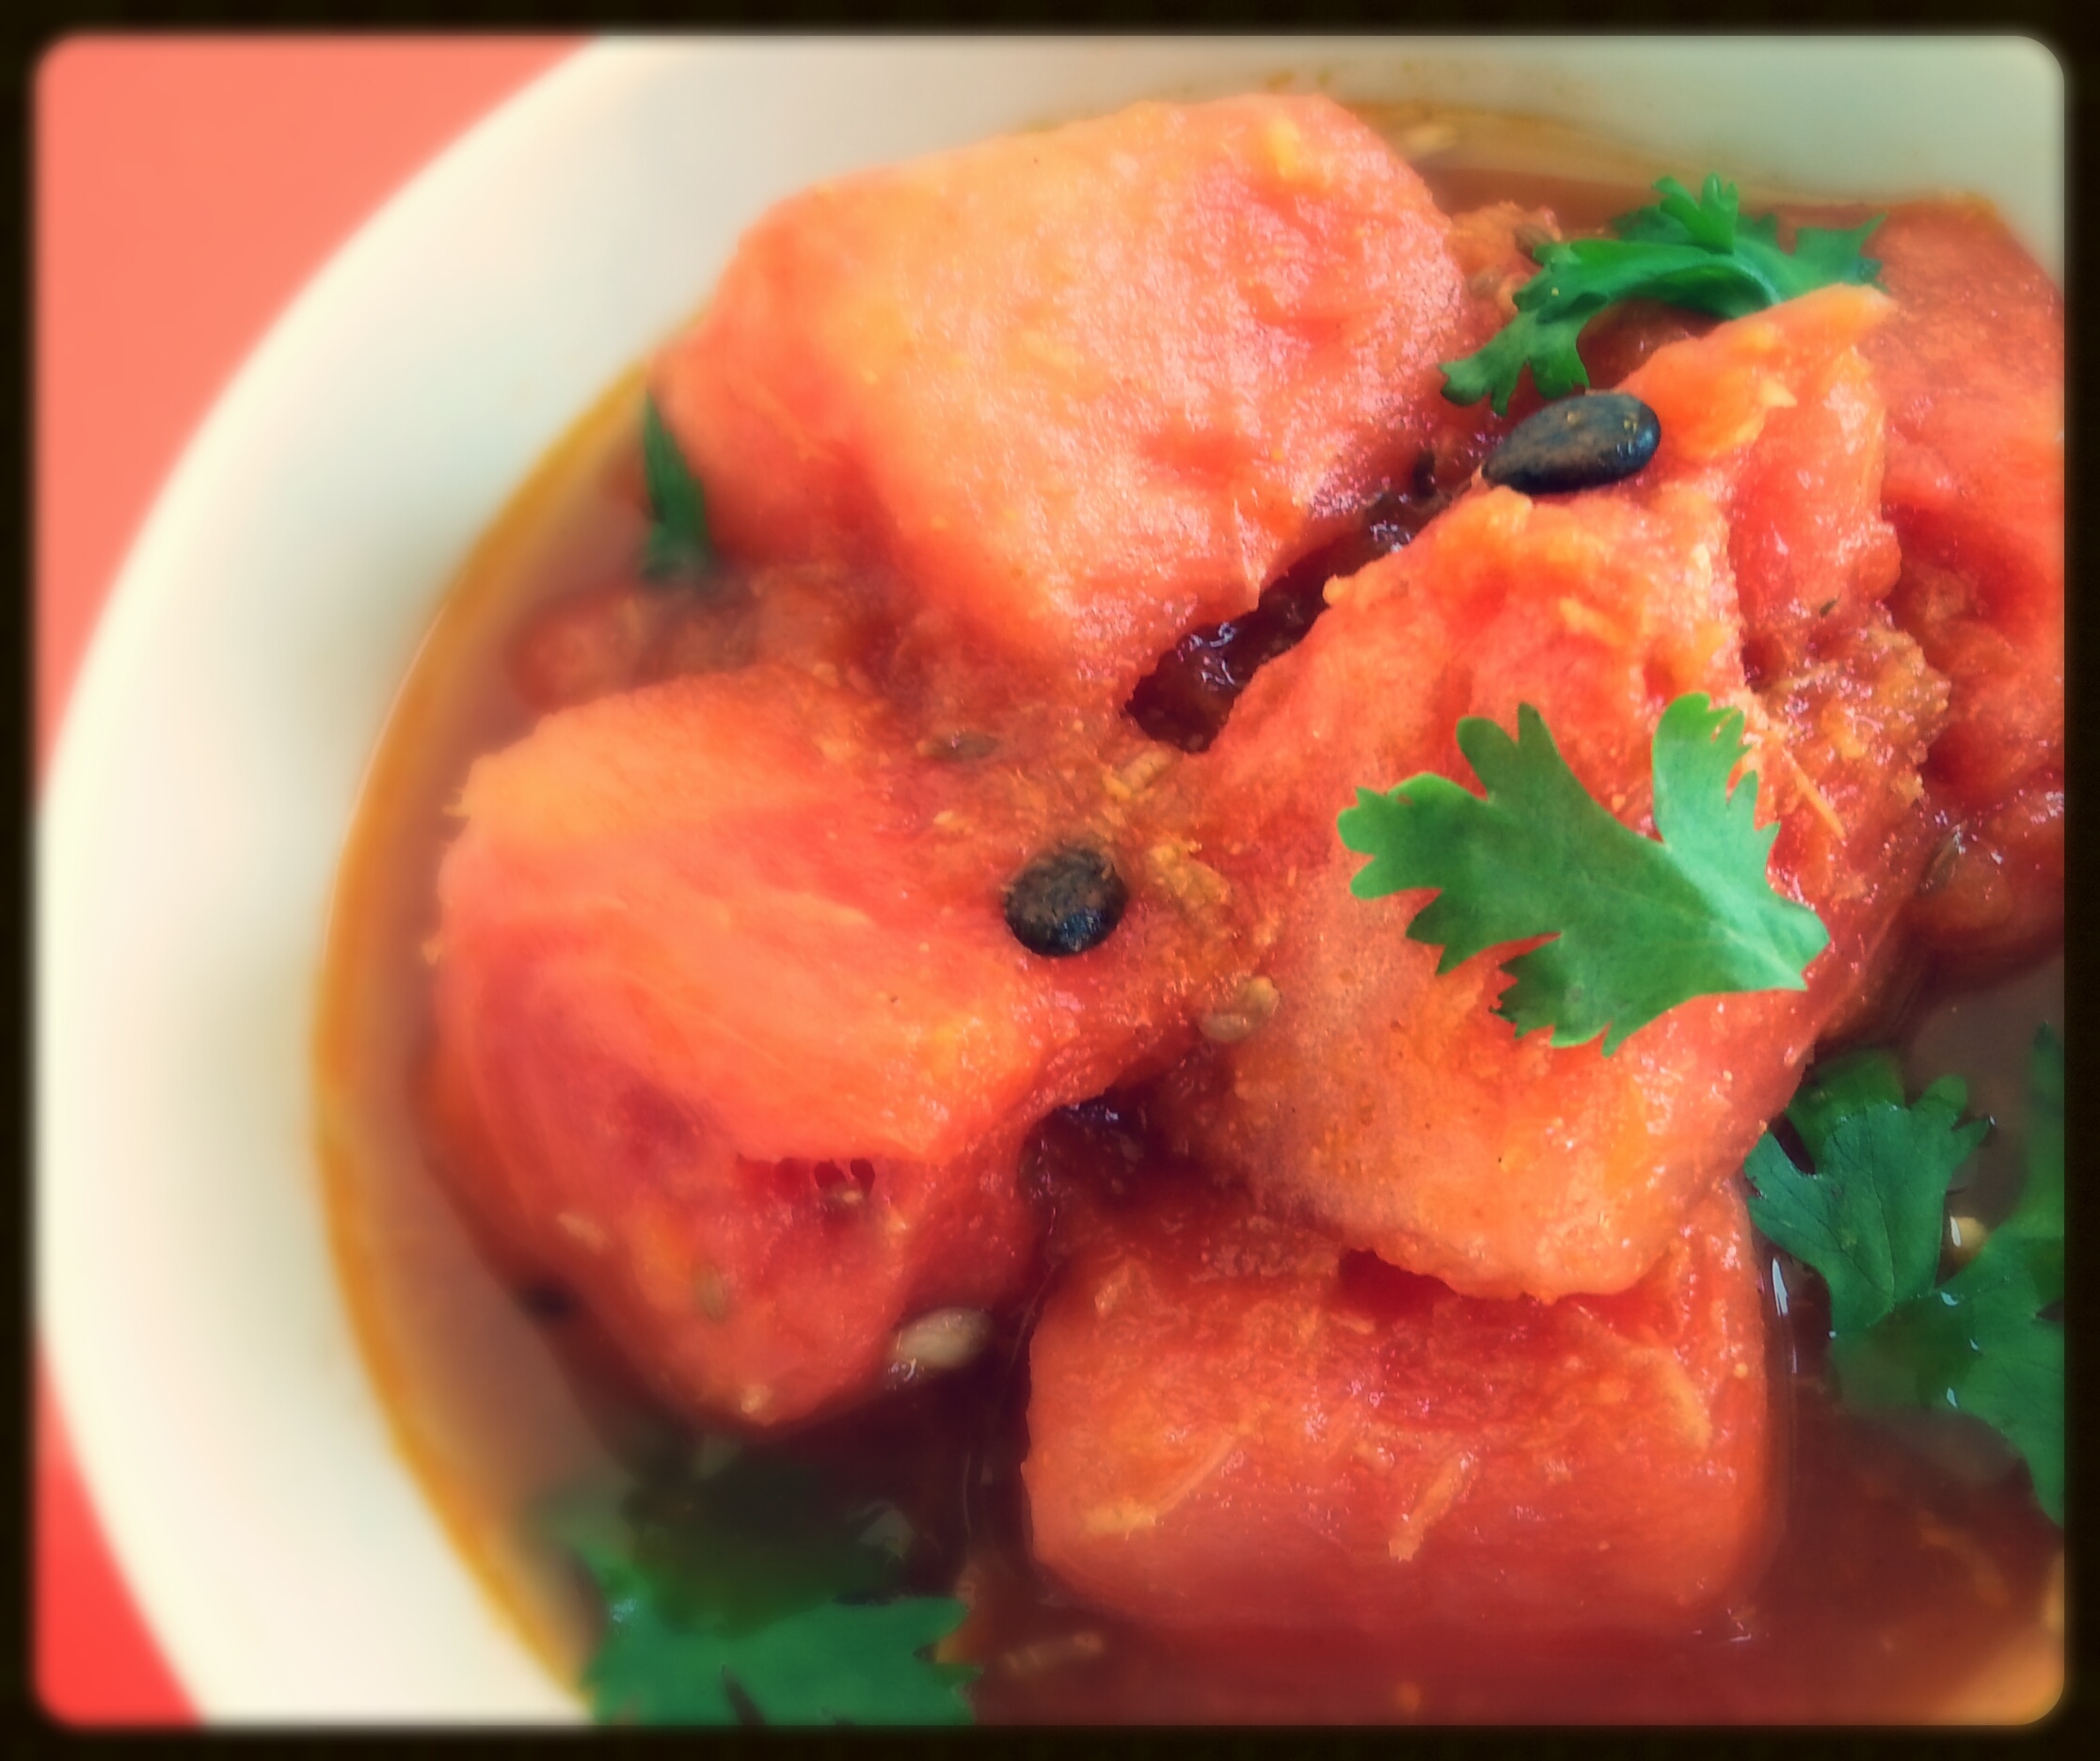
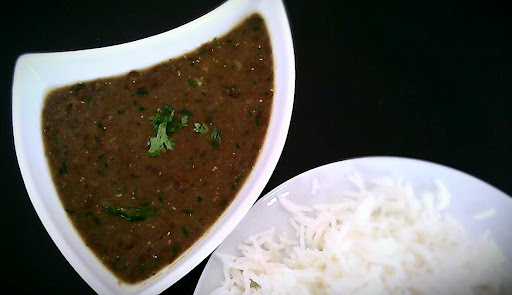
Image

Afghani Mutton Rosh

After the appetizers, came a selection of naan and barbecue items such as Malai Boti, Gola Kabob, and Hara Fish, boneless cubes of fish marinated in fresh herbs. But the real star of this course was the Mutton Ribs, a fall-off-the bone tender rack of mutton steamed and grilled in a rich and spicy marinade. I was told Barbecue Delights sources all of their mutton from Pakistan from the best high quality suppliers. The ribs were a testament to that quality.

Image

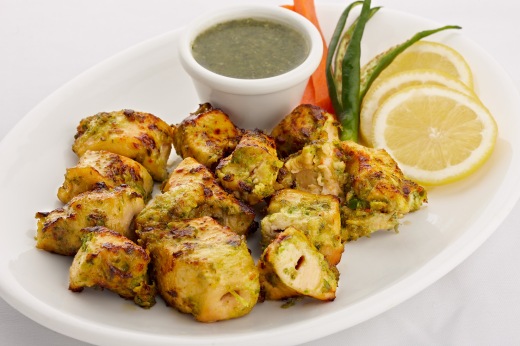
Malai Boti, Boneless chicken marinated in cream, milk, and herbs and spices

Image

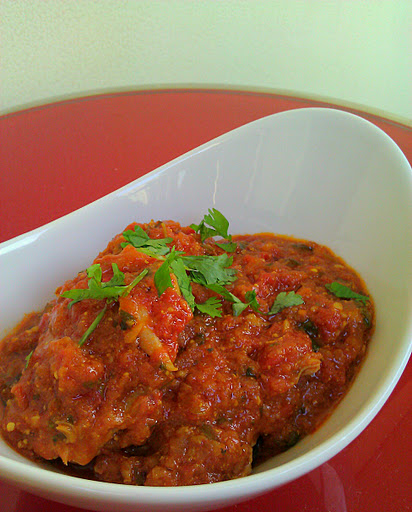
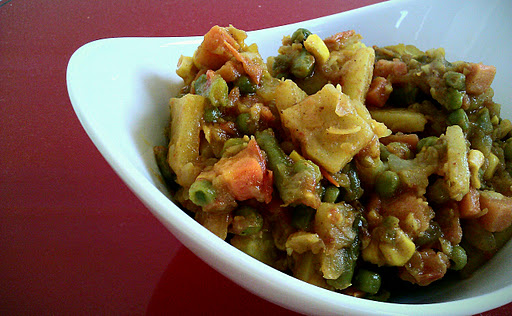
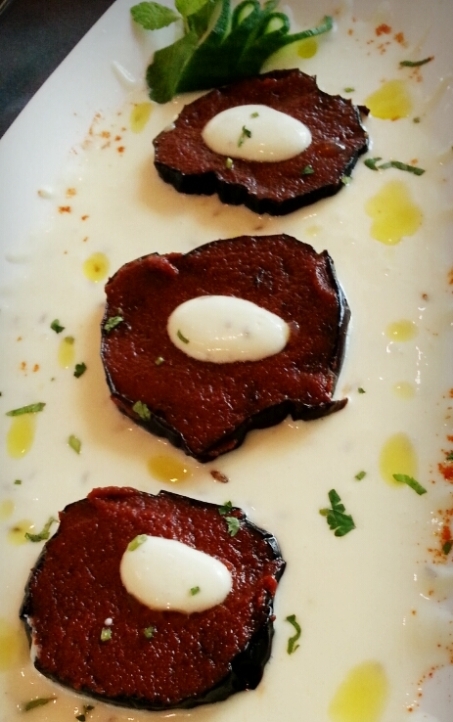
Although I was stuffed at this point, I realized the main courses still hadn’t been served. Before I knew it, Chicken Karahi, Prawn Masala,  Afghani Pulao, Daal, and Banjan Borani was placed before me. The Banjan Borani seemed to be the blogger favorite of the afternoon. It is an Afghani eggplant dish, with a garlicky yoghurt and tomato sauce. It has simple yet bold flavors and an elegant presentation. I have written the recipe at the end of the post so you can create your own Banjan Borani at home.

Image

After the mains we finally moved on to dessert of jalebi, kheer and pistachio ice cream. I cannot end any meal without dessert, even a very very large filling one, so I gobbled a few jalebi before leaving, loving the sticky sweetness of every bite. As we left, we received a beautiful parting gift of a colorful little rickshaw so I can showcase a little “truck art” style at home.

Image

Barbecue Delights Locations:

Downtown Dubai-Clarens Building

Mohd Bin Rashid Boulevard (formerly Emaar Boulevard)

Tel: 04 4343 443

 The Walk in Jumeirah Beach Residence

Adjacent to Sofitel Hotel, Dubai

Tel: 04 4230632

Lamcy Square, Oud Mehta Road

Near Movenpick Hotel, Dubai

Tel: 04 3359868/69

Note: I was a guest at a lunch hosted by Barbecue Delights. Some of the images in this post are from Barbecue Delights

Barbecue Delight’s Banjan Borani – Afghani Eggplant Recipe
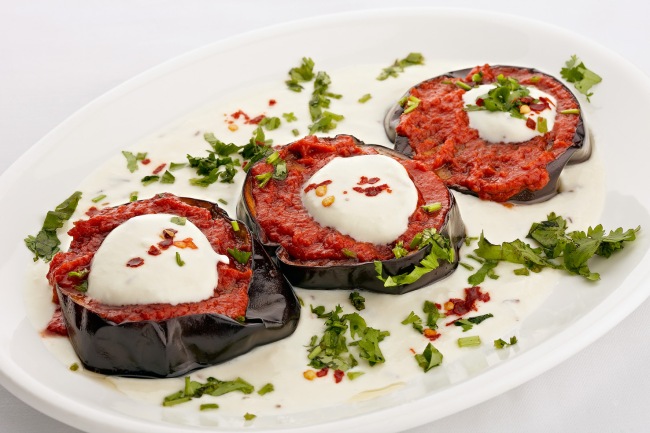
Image

INGREDIENTS:

500g (About 1 pound) Eggplants, cut into round slices

500g (About 1 pound) Yoghurt

15g (1 tablespoon) Garlic paste

5g (½ teaspoon) Cumin seeds

5-10g (1-2 teaspoons) Olive oil

100g (about ½ cup) Tomato paste

15g (1 tablespoon) vinegar

Salt and Pepper for seasoning

Coriander for garnish

Olive oil/Cooking oil for frying

PREPARATION:

1. Fry OR bake eggplant slices until cooked.

If frying, heat oil in pan and fry on both sides for a couple minutes until cooked.

If baking, brush each side of eggplant slice with olive oil and sprinkle both sides with salt. Bake at 450F for about 10 minutes each side or until done. Remove and cool.

2.  Add garlic paste into yoghurt. Saute cumin seeds in oil and add into yoghurt. Mix well.

3. Mix tomato paste and vinegar in a small bowl.

4. Spread a layer of yoghurt on serving dish. Place cooked eggplant slices on yoghurt. Spread the tomato paste mixture on top of eggplant slices. Add a bit of yoghurt on eggplant. Garnish with chopped coriander.

Watermelon Curry and Pantry Diva Live at Blogger Week

I am one of those people who fantasize about having my own cooking show on TV. Sometimes when I’m in my kitchen, I pretend I’m on the Food Network show “Chopped”, where I have a mystery basket of ingredients and have to make an amazing dish for the harsh judges before time runs out.  Actually now that I think about it, this scenario isn’t too far off from the daily dinner rush at home with my family of angry judges hungry kids.  

Image

Although winning “Chopped” would be amazing, what I really want is to have my own cooking show where I connect with my fans and share delicious recipes. This Friday I got to do just that, when I took part in the “Meet the Blogger Week” event sponsored by Lootah Premium Foods at Lafayette Gourmet.

Image

It was an amazing experience to put on the microphone and make my watermelon curry in front of a live audience. The live interaction with the crowd really forms a connection you just cannot get from behind a computer. Blogger week is still going on until September 23rd, with cooking demos at 12 noon and 4pm. You can also win a trip to Mauritius by posting your picture from the event on Instagram; just caption it #LPFbloggerevent and tag @Lootahpremiumfoods.

Image

My dish for the event was a Rajasthani watermelon curry. Although it is called a curry, I think of it more as a light first course (served chilled or room temperature like a borscht or a spicy soup), or as an additional side dish complementing other sides (like daal or sabzi) in an Indian meal.  The watermelon curry can be eaten hot or cold and is a combination of sweet, sour, and spicy flavors. I find is especially refreshing to enjoy during the scorching summer months in Dubai.

Pantry Diva Tip: This is a great way to use up excess watermelon after a barbecue or party. This is also an easy dish to make if you are short on time and need to quickly dash to the store, as all the ingredients should be in your pantry except the watermelon!

Watermelon Curry

ImageINGREDIENTS:

 2kg (4.4 pounds) watermelon pieces cut into 1.5 inch cubes (seedless watermelon if possible)

1 teaspoon paprika powder

½ teaspoon red chili powder (to taste, leave out if prefer mild flavor)

1 teaspoon turmeric powder

1 ½  teaspoon coriander powder

1-2 teaspoon garlic puree

Salt to taste

2 tablespoons vegetable oil

1 teaspoon cumin seeds

 Juice of 2 large lemons

Sugar to taste (optional)

Coriander (for garnish optional)

PREPARATION:

1. Cut watermelon into 1.5 inch cubes, and divide 1.5kg (3.3 pounds) for the curry, and 500g (1.1 pound) for the juice.

2. Take 500g (1.1 pound) watermelon cubes and make sure there are no seeds. Puree in food processor to make juice. To the juice add: paprika, turmeric, chili, and coriander powders, garlic puree, and salt. Set aside.

3. Heat vegetable oil in wok and add the cumin seeds, and after 20 seconds add the juice. Lower the heat and simmer for 5 minutes or until the liquid reduces by a third. If using sugar, add now, and also add the lemon juice. Cook for another minute. (I prefer to leave out the sugar as I feel the watermelon is sweet enough).

4. Add the 1.5kg (3.3 pounds) cubed chopped watermelon and cook over a low heat for 4-5 minutes. Gently toss while cooking so all the pieces are covered in the spice mixture. Turn off heat and garnish with coriander if desired.

Serves 4 as a first course or 6-8 as a side dish

*Recipe inspired by The Great Curries of India by Camellia Panjabi

Bhindi Bhaji – Indian Spiced Okra

Happy New Year! 

Another year, another set of resolutions. This year I made very few as I was keen to follow them all year round and thought having only a few easy ones would be the key to my new year resolution success. Sadly, it is not even the end of January and almost all of them have been broken.  

There are three I have and break every year :
  • Eat a healthy diet. (less/no sugar)
  • Drink more water (8 glasses a day)
  • Exercise more (4-5x per week)
I sincerely thought this was my year to achieve them, but it is my birthday this week and since I intend to celebrate it wholeheartedly (gluttonously and tipsy) these 3 will be out the window by the weekend.

But there is some hope. I do have a few resolutions left and definitely one that I intend to keep:  Blog more.  So here we go with my first post of the year, with hopefully many more to come.  

Happy 2013 everyone!
Bhindi Bhaji – Indian Spiced Okra


INGREDIENTS:
1 pound okra trimmed and cut into ½ inch pieces 

NOTE: It is important you get the small short tender okra, not the long hard one. The hard one never tastes as good. I usually find good okra in the organic markets or organic section of the grocery store. If you cannot  find it, perhaps try the Indian grocers.

1 cup chopped onion  (I like to use Indian onions as they are spicier but can use any you prefer)
2-3 teaspoon cooking oil
1 teaspoon turmeric
½ teaspoon red chili powder
½  teaspoon salt or to taste
1-2 chopped medium tomatoes

PREPARATION:
1. Saute onion in oil until soft and translucent  on medium high heat(do not brown).
2. Add turmeric, chili and salt.
3. Add tomato and sauté for few minutes until becomes a paste
4. Add chopped bhindi and cook uncovered until soft.  My hubby prefers it quite soft so cook at least 10-15 minutes stirring every couple minutes.

Serve with any Indian bread such as tandoori roti  or paratha. Serves 2.

Vegetable Pakoras with Coriander and Mint Chutney

I remember the day my foodie 3 year old became a food enemy.  Before that day, I smugly grinned while other mothers talked about resorting to feeding their kids plain boiled pasta for days.  I scoffed at Annabel Karmel’s cookbooks that talked about the need for special recipes to feed fussy toddlers. As my kids ate their edamame and chicken satay, I thought I missed out on the picky food phase and even had the nerve to think it was because my superior cooking skills.

But then it happened. I had made a huge meal of vegetable pakoras, chicken curry, and masoor daal. These were things my son had previously eaten and liked. But instead of eating my food, he chose to have raisins and string cheese for dinner. I thought maybe he wasn’t feeling well. The next day I made some chicken nuggets and french fries (both baked but still very yummy) and he didn’t even try them!! Eating habits like that can drive any cook to insanity.

I then thought about how I always ate everything I was given when I was a child. But then slowly, little details began popping up in my mind suggesting otherwise. One example was during a vacation in India with my family. We were on an extensive tour of Jaipur, Agra and Rajasthan and between sightseeing, had dined at many amazing restaurants which offered numerous varieties of delicious food. But no matter what the dish was, for some reason all I wanted to eat were pakoras and Pepsi. Day after day, I turned away many beautiful dishes to the wrath of all servers and family members and was branded an ungrateful wretch.

So much good food to experience but all I could eat were pakoras and Pepsi for 2 weeks! My parents must have been as annoyed with me as I am now when my kids don’t eat what they are supposed to. It’s interesting how life comes full circle.

Vegetable Pakoras with Coriander and Mint Chutney


Ingredients:
3 cups Chickpea Flour (Besan)* Usually found in the Indian section of grocery store
1-2 cups water
1 ½ teaspoon salt
1 ½ teaspoon red chili powder
1 large potato, peeled and sliced into matchsticks
1 bunch green onions, chopped
5 red Indian onions, peeled and cut in long slices
1 bunch coriander (cilantro), chopped
1 bunch spinach, chopped
Vegetable Oil for frying

Preparation:
1. Add first 4 ingredients to create pakora batter. Add additional water as necessary. Mix well in large bowl so batter becomes thick enough to coat the back of a spoon. If you are not sure with the consistency, thicker is better than runny. Let sit for 30 minutes.
2. Add all vegetables to batter until well mixed. (The vegetables should be LIGHTLY coated. The vegetables are the stars, not the batter. It may look like the batter is not enough, but as long as there is enough batter to coat all the veggies you will be fine. This light coating ensures crisp pakoras and not heavy soggy oily ones. )
3. Heat oil until hot. Fry pakoras by sprinkling by hand into hot oil. Do not drop a big blob of batter into the pan but instead sprinkle and spread evenly as a thin layer in the oil. Fry until golden brown.
4. Drain on paper towel. Serve warm with coriander and mint chutney.   

Masoor for my Monsieur – Masoor Daal Recipe

A miracle happened today that brought me out of my blogging hiatus. My eternally picky husband who only likes his mother’s cooking complimented my masoor daal! His exact words: “Wow, this tastes just like back home, maybe even better.” I just stared at him in disbelief for a few seconds. After the initial shock wore off, I ran to the computer to instantly document this moment so it would be immortalized forever. My husband has always been my biggest food critic, particularly for desi food, so this was a huge personal achievement.

Indian food had always been a culinary obstacle for me. I guess I never learned how to make it since my mom was an amazing cook and it was always perfect and readily available.  Also I somehow wasn’t interested to learn about turmeric and cardamom with the same zest I wanted to learn about oregano and rosemary which seemed so much more exotic. So I ended up learning to make many international cuisines, but not my own Indian one. But then I met my biggest food critic who only enjoyed eating the one cuisine I couldn’t make!  He was not impressed with my existing culinary arsenal, and I resolved to one day win him over.

After many foodie battles and take-out dinners, I somehow ended up marrying my food adversary. Strangely enough, some well meaning Auntie gave me an Indian cookbook for a wedding present, and it was from that book that I tried making Indian food for the first time. I just followed the recipes blindly and they kept coming out flat. And my personal food critic was always there to point out the flaws.

Looking back, I now realize my weakness was my inability to understand the common Indian spices and how each spice enhanced or affected the taste of the dish. If I wanted to fix the flavor of my dish, whether I needed to add coriander powder, or cut down on the cumin were a mystery to me.  I also realized my ignorance was partly due to my lack of any previous guidance making any desi dishes. In many Indian kitchens (including my home), there is a round metal container, with smaller round containers inside for each individual spice. Whenever a meal is to be made, the matriarch of the family will take out this container and to the untrained eye, just haphazardly throw all the necessary spices into the dish, and before you know it, the dish is done and seasoned beautifully. No matter how many times you observe this phenomenon, you will never learn to cook Indian food this way! Trust me I have tried.

But then I practiced. After a lot of trial and error, I’ve learned quite a bit, and on my way to becoming the lady with my own round metal spice container. But the best measure of my success with Indian food is that my food critic finally gave a glowing review.

Masoor Daal


INGREDIENTS for Daal:
1 cup Masoor Daal , soaked in water for a couple hours.
*If you do not soak daal first, cooking time will be significantly longer, unless you use a pressure cooker to cook daal. My method is for stovetop only.
1 teaspoon turmeric
½ teaspoon red chili powder
½ teaspoon salt
1 tablespoon garlic, grated
1 teaspoon tamarind (imlee) paste – Can be found in most supermarkets or Indian grocers. I used Priya brand

INGREDIENTS For Tadka to add in daal:
1-2 tablespoon vegetable oil
1 onion, chopped
1 teaspoon cumin seeds
1 teaspoon ginger, grated
1-2 green chilis
1 cup cilantro, chopped

PREPARATION:
1. Add soaked daal and turmeric, chili, salt, and garlic in a pot with 5 cups water and bring to boil.
2. After boils, partly cover and lower heat and cook until soft.  Add additional water as necessary.
3. When done, mash or blend to desired consistency, (My hubby likes it quite blended) and add tamarind paste until fully incorporated. Set pot aside.
4. Heat oil in separate pan. Add onion and lightly brown. Add cumin seeds, ginger, green chilis and coriander.
5. Fry all together and add to hot daal. Mix.

Serves 2 generously. Serve with basmati rice.

Dad’s Chicken Curry

Several  of my friends have recently had little girls. I especially love to watch the otherwise super macho fathers coo and babble at their little bundles of joy.  My dad has always been a guy’s guy. He loves to watch football and doesn’t like the idea of men wearing wedding rings since “jewelry is for women.” 

He ended up having two daughters and ironically the same man who thought pink was a “girly color” would pick out our cute frilly dresses for our birthday parties or paint our nails with nail polish if mom was too busy.
More recently, my dad  discovered his talent for cooking and made me a great chicken curry on my last trip home.  I asked him for the recipe, but my version turned out nothing like his. (I mean not at all like his. Dad if you are reading this…are you sure you gave me the right recipe?? 😉   Anyway, I did make a chicken curry inspired by his, and it turned out great. Even the picky hubby enjoyed it, especially with parathas.
Dad’s Chicken Curry
Ingredients:
8 skinless chicken thighs, approx 500g
3-4 red onions finely chopped (about 1 cup)
3 tbsp garlic, shredded
1 tbsp ginger, shredded
1 tbsp salted butter
1 tbsp cooking oil
1 teaspoon turmeric
1 14oz can of peeled chopped tomatoes
1 small bunch cilantro, chopped
1/2 teaspoon red chili powder  (to taste)
½ cup plain yogurt
 ½ teaspoon salt (to taste).
Preparation:
1. In a large pot add butter and oil on medium high heat. In the melted butter add the finely chopped onion and the garlic and ginger pastes. Stir continuously for a few minutes until onions are soft and the contents become a paste.
2. Add the chicken pieces and cover them with the mixture in the pot. Cook for few minutes until chicken just about cooked.
3.  Add the chopped and peeled tomatoes, salt, turmeric powder, red chili powder and yogurt. Mix well.  
4. Cover the pot and let cook for additional 10 min, or until chicken is fully cooked and most of the liquid is absorbed. 
5. Remove from heat, add chopped cilantro and stir.
6. Garnish with a bit of chopped fresh cilantro and serve with paratha. Makes about 2-3 generous servings.

Aloo Tikki with Coriander and Mint Chutney

My son’s current favorite bedtime story is the Gingerbread Man. He especially loves the part “Run, run as fast as you can, you can’t catch me I’m the Gingerbread Man!”  So when he asked if we could make our own gingerbread man I happily agreed. After quickly finding a recipe online and scanning the cupboard to make sure we had all the ingredients, we started. 

As we were rolling out the dough I noticed one item I did not check I had: the gingerbread man cookie cutter. Not wanting to alarm my adoring spectator I decided to cut out the gingerbread men freestyle with a knife. This task was not as easy as it would seem. Each gingerbread man came out more deformed than the next, with lopsided or broken limbs or with heads growing out of arms. None of them seemed like they could run like the one from the story, or even limp for that matter. Nonetheless, after they were baked and decorated, my 3 year old loved them all. Whew!

So after that ordeal, I needed something easy to make for dinner. I decided to make aloo tikkis since they are easy to shape (round!). Again I didn’t anticipate one small detail: everyone in my house likes to eat them differently.

1. I prefer my tikki slightly warmed with a side of green chutney mixed with a splash of kechup.

2. My husband makes a sandwich with a cheese bread roll, the bottom slice spread with green chutney and ketchup. He then adds a layer of crushed Nacho Cheese Doritos and then smashes the tikki on top. He covers the top slice spread with mayonnaise.

3. My one year old likes aloo tikki in a bowl with yogurt and ketchup all mashed together.

4. My three year old didn’t even eat one bite since he was so full with gingerbread men :).

I love how the simplest dish can be enjoyed different ways. I am already imagining tomorrow’s chutney sandwiches I am going to be making with the leftovers….

Aloo Tikki with Coriander and Mint Chutney


INGREDIENTS for Aloo Tikki:

3 large potatoes – boiled with skins on, then peeled
1-2  teaspoon ground cumin
1 tablespoon ground coriander
1 chopped green chili (I leave this out when I make for kids)
½ teaspoon red chili powder
Salt and pepper to taste
1 bunch chopped fresh coriander
1 bunch chopped green onion
2 eggs, beaten
Oil for frying
**Note all spices can be adjusted to taste.

PREPARATION For Aloo Tikki:

1. Mash potatoes in large bowl, when potatoes are still slightly warm. Add all spices and chopped coriander,  green onion and green chili if using. Mix well. Taste and adjust spices and salt if necessary.

2. Shape the mixture into 3” flat rounds. Makes about 8-10 tikkis.

3. Beat 2 eggs in bowl and keep aside.

4. Lightly coat frying pan with cooking oil. Keep on medium high heat.

5. Take one potato round, dip in egg, then put in hot frying pan. Fry 2-3 minutes per side. Repeat  with remaining rounds.

6. Serve with coriander and mint chutney. Recipe below
.
INGREDIENTS for Coriander and Mint Chutney:

1 ½ bunch coriander
½ cup mint leaves
¾  cup plain yogurt
½ teaspoon ground cumin
1 green chili (optional)
Red chili powder (to taste)
Salt (to taste)

PREPARATION for Coriander and Mint  Chutney:

1. Put all items into a blender and blend into a fine liquid. Taste and adjust spices if necessary.

Mixed Vegetable Sabzi

I am always looking for cooking shortcuts. My hungry boys eat 6 times a day so if I don’t cut some corners I will never leave the kitchen. My latest creation is the “Arabic Pizza” for those days when I am really in a time crunch. I get some Arabic bread, and quickly warm it on the skillet.  I then add some ketchup and oregano and grate some cheddar or feta on top and blitz it for a few seconds in the microwave. The finishing touch is to cut it into pizza slices using the pizza cutter so it looks more “real”.  But I knew I had gone too far when we went out for pizza and my kids actually preferred mine! I was shattered that I had ruined their developing taste buds. At this rate we will never enjoy a true NYC slice together and I absolutely cannot have that.

So, I decided to make something more  interesting, more spicy, and to incorporate vegetables. I came up with this mixed vegetable sabzi that uses ingredients I always have on hand and I can make in a flash. (Although not as fast as the Arabic Pizza!).
MIXED VEGETABLE SABZI


INGREDIENTS:

1 large chopped onion (Indian red onion)
1 peeled chopped potato (can microwave for couple minutes before if you prefer for faster cooking time in sabzi)
2 cups frozen mixed vegetables
1 chopped green chili
1-2 tomatoes
1 tsp salt (or to taste)
¾ tsp turmeric
½ tsp red chili powder (or to taste)
1-2 teaspon coriander powder (you can roast whole coriander seeds and finely crush for a bolder flavor if you prefer)
2-3 tsp cooking oil
1 tbsp garlic, grated
1 teaspon ginger, grated

PREPARATION:

1. Heat oil in pot. Add onion and cook until softened. Keep on medium high heat.

2. Add in ginger and garlic and sauté for a couple minutes. 

3.  Add potato and sauté for a few minutes. Add the vegetables and the tomatoes and green chili and sauté. Add salt and all spices and mix.

4. Cover and put on medium heat. Cook for 15 minutes or until all veggies cooked and flavours incorporated.  Season to taste. Garnish with fresh coriander if preferred.